
If you just started stargazing, take a few months to make yourself familiar with the constellations, the Moon, and the planets, observing the night sky with your unaided eyes only. If you’re still enjoying the stargazing hobby and the world of astronomy after a month or two, it’s time to get yourself some astronomy tools!
There is a vast variety of astronomy tools and instruments available on the market today with a precision and quality like never before, so it’s an exciting time to get into astronomy.
Any serious amateur astronomer will tell you that there is no single perfect instrument but rather a collection of astronomy tools you build up over time, each with unique tradeoffs, qualities, and limitations. For instance, binoculars are portable and ideal for observing the Moon and meteor showers, and a small refractor will serve you well when it comes to planetary observations. While a large and bulky Dobsonian telescope will probably not let you travel far from home, it will offer the most amazing views of Deep Sky Objects, such as galaxies, star clusters, and nebulae.
This article will help you choose the best astronomy tools you need for visual observation. We will not cover equipment needed for astrophotography, as long exposure photographs require a heavy and expensive automated mount, in addition to considerably more experience. Often, these mounts can cost as much as a large and high-quality telescope. Keep reading to learn more about the essential astronomy tools you need to take your stargazing journey to the next level:
Binoculars

Binoculars are an excellent first instrument to observe the night sky. They are relatively cheap, portable, and multifunctional. If you realize you don’t enjoy astronomy after all, you can still use them to go trekking or camping.
Whether you’re an experienced amateur astronomer or you’re just looking for the smallest and cheapest tool to start your astronomical journey, binoculars will be an excellent addition to your astronomy tools collection.
When looking for binoculars, it is important to understand their specifications. So, let’s look at what makes the best binoculars.
Comprehending the Specs
Binoculars are characterized by two numbers, for example, 7×35 or 10×50. The first represents the magnification, the second the diameter of the aperture, measured in millimeters.
When selecting a binocular for stargazing, it is best to choose one with a low magnification and a large aperture. Stars, planets, and comet showers all appear point-like, no matter what magnification you choose. On the other hand, a high magnification results in a darker image and a smaller field of view, both of which are undesirable side effects.
The aperture is essentially an extension of your eyes. It collects light on a larger surface area, giving a brighter image with a better resolution. At night, the typical size of your pupils is around 5mm, which means that a 50mm aperture collects (50/5)^2 = 100 times more light.
There is, however, a limit to which you should favor low magnifications and large apertures. This limit is determined by the so-called exit pupil, that bright spot at the end of the binoculars. Ideally, you want the size of the exit pupil to match the size of your pupils. As you age, your pupils won’t dilate as much at night. Children’s pupils dilate up to a diameter of 8mm at night, but this number is closer to 5mm for a middle-aged person. So, if you’re stargazing with your kids, you might want to consider purchasing a separate set of binoculars for your children.
To obtain the exit pupil of a binocular, divide the aperture number by the magnification. For instance, 10×50 and 7×35 binoculars both have an exit pupil of 50/10 = 35/7 = 5mm. Suppose you lower the magnification and increase the aperture beyond this limit. In that case, the exit pupil will become larger than the size of your pupils, so the light cone produced by such a binocular won’t fit your pupils. You would be wasting precious light, defeating the purpose of the large aperture you originally paid for.
We always tend to want the most powerful and expensive instrument, but at some point, we’ll start facing issues such as portability and storage (large binocular require mounts). Therefore, the ideal binocular is the one which you’ll use most often.
Recommendations
Based on our analysis, a few excellent choices are:
Telescopes
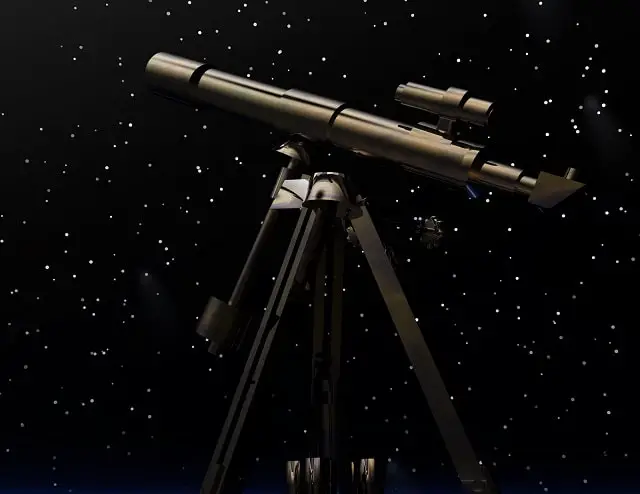
Italian physicist Galileo Galilei first used telescopes in 1609 to observe the Moon. He discovered four satellites of Jupiter and resolved nebular patches into stars.1 Nowadays, you will come across three main types of telescopes, each with pros and cons.23
Newtonian Reflector
A reflector is a telescope that focuses light using mirrors. It consists of a primary mirror at the back of a long tube, a secondary mirror, which reflects light from the primary mirror at an angle of 45°, and an eyepiece, which focuses light and magnifies the image.
Reflectors are usually the cheapest option if you’re looking for a large aperture. For this reason, they are the best choice for observing faint Deep Sky Objects.
Reflectors need occasional maintenance to make sure the mirrors are aligned. This process is called collimation and is most easily performed with a laser collimator. If you move your telescope often, it may be necessary to collimate it once every few months. Each time you’ll get faster, and with some practice, you’ll be able to do it in a matter of minutes.
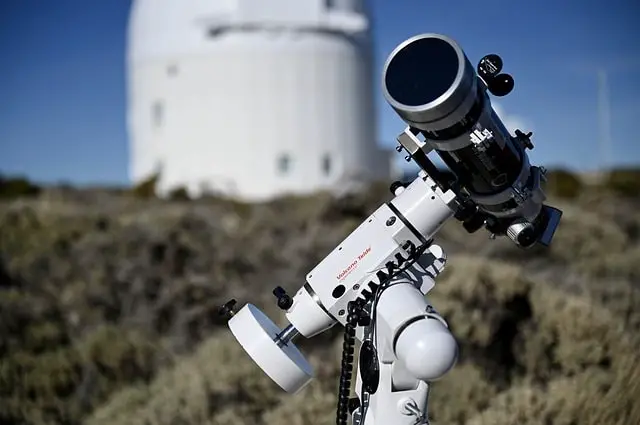
Galilean Refractor
A refractor is a telescope that collects light using a system of lenses. It consists of a primary lens at the front of the tube and an eyepiece at the back.
It’s easy to distinguish between refractors and reflectors by looking at the position of the eyepiece. Refractors have the eyepiece at the back of the tube, while reflectors have it at the front, close to the secondary mirror.
Refractors are usually more expensive per inch of aperture, but they generally give the sharpest image when it comes to lunar and planetary observations. Indeed, they’re slightly more efficient than mirrors because light interacts with fewer optical components.
Schmidt-Cassegrain
The Schmidt-Cassegrain telescope takes the best features of both worlds. The front of the tube contains a lens called a corrector plate, which focuses light on the primary mirror at the back. Light is then reflected unto the secondary mirror at the front of the tube, which then sends it through the primary mirror and into the eyepiece at the back of the tube.
Schmidt-Cassegrain telescopes can be recognized from their compactness, usually twice as short as a reflector with a similar aperture. The price is generally in between that of a reflector and refractor, per inch of aperture. It’s a good all-around performer and is often used for astrophotography.
As with reflectors, they also require collimation. It might take them slightly longer to cool down to the temperature of the surroundings (usually an hour), while refractors are better for those looking for a “grab and go” instrument.
Recommendations
Having said this, if you are planning on buying a cheap and small telescope, up to 6 inches in aperture, refractors are probably the best choice. Some of the best telescopes to add to your astronomy tools collection are:
If you’re looking for something a bit larger and more expensive, a Dobsonian telescope might be perfect for you. They are around 8 to 12 inches (or higher), either manual, GoTo or PushTo. In order, we have:
- Sky-watcher 8’’ (or 10’’, 12’’) Flextube Dobsonian Telescope
- Sky-watcher 8’’ (or 10’’, 12’’) Flextube SynScan GoTo Dobsonian Telescope
- Orion SkyQuest XT10 Intelliscope Dobsonian Telescope
Telescope Mounts
Once you decide what telescope to buy, you’ll need to choose a mount. There are two main types of mounts, the Equatorial and the Dobsonian mount. Some are equipped with a GoTo, which automatically centers the telescope in the desired direction, making it much easier to observe objects at the limit of your telescope’s abilities. However, manually hunting down galaxies and nebulae can be an enjoyable and rewarding experience in its own right. It is completely up to you, but if you’re looking for a motorized GoTo, you will need to factor in another $300.
Dobsonian Mount
Dobsonian mounts are ideal for beginners. They are extremely easy to use and offer excellent value for the money. A great finder scope will make it much easier to manually locate and center faint objects you wouldn’t otherwise be able to observe with your unaided eyes only.
Dobsonian mounts support the GoTo system; however, this can be quite expensive. Another good option can be a Dobsonian PushTo, which essentially works like a GoTo, but it is not motorized. The mount calculates the target’s position and gives you instructions on how to move the telescope.
Equatorial Mount
Equatorial mounts require more experience to set up correctly, as it is necessary to align them with the pole star. Newcomers often don’t realize that their telescope comes with an equatorial mount and end up not using it correctly. If you’re looking to buy your first telescope, opt for a cheaper and simpler Dobsonian mount.
Equatorial mounts are divided into six classes, from the lowest (EQ1) to the highest (EQ6), which offers better stability and can sustain larger loads. EQ5-EQ6 are required for astrophotography, while EQ2-EQ3 are only suitable for visual observations.
If set up correctly, an equatorial mount will make it easier to hunt down faint objects and keep them centered in the eyepiece.
Telescope Eyepieces
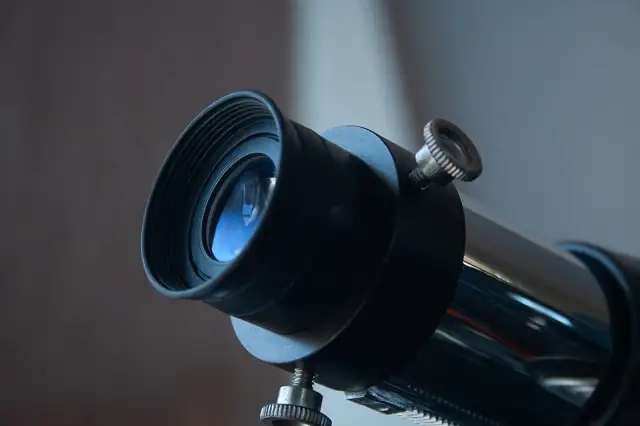
The eyepiece is the last part of your telescope. Its function is to focus light to your eyes and magnify the image. A focal length characterizes every eyepiece, usually in the range of 32mm to 4mm. To find out what the magnification of an eyepiece is, divide your telescope’s focal length by that of the eyepiece. For instance, a telescope with a focal length of 1m equipped with an eyepiece of 20mm will give a magnification of 1000/20 = 50x. Therefore, the shorter the focal length of the eyepiece, the higher the magnification you’ll get.
Maximum, Minimum, and Optimal Magnification
There are lower and upper bounds on the magnification you should be using. As we saw in the case of a binocular, to obtain the minimum magnification of a telescope, divide the size of the aperture by the size of your pupils, which is typically 5mm. For instance, the minimum magnification of a telescope with an aperture of 100mm is 100/5 = 20x.
Two distant objects can appear as the same object if they’re close enough together. Like our eyes or even a telescope, every light sensing device is characterized by a quantity called resolution. The better the resolution, the farther can the two objects be while still appearing as separate.
If we use a very large magnification, the telescope’s resolution becomes the limiting factor, so that enlarging the image even further wouldn’t add any more precision to the image. The maximum magnification is just the diameter of the aperture of your telescope expressed in millimeters. Therefore, the maximum magnification of a telescope with an aperture of 100mm is 100x.
So, is there an optimum magnification? When observing Deep Sky Objects, you want to aim for an exit pupil of about 2mm, so that light is focused on the most sensitive part of your retina. So, for a telescope with an aperture of 100m, this corresponds to a magnification of 50x.
Recommendations
Three high-quality eyepieces that give exit pupils of 3-5mm, 2mm, and 1mm will serve you well for many years to come.4
Therefore, if your telescope has an aperture of D (in millimeters), you should choose a set of eyepieces with magnifications D/5, D/2, and D. To determine the focal length of the desired eyepiece, divide the focal length of your telescope by the desired magnification.
It is also possible to combine an eyepiece with a Barlow lens, which results in an eyepiece with effectively double the magnification. Therefore, a set of three eyepieces with a Barlow lens gives you six different possible magnifications.
Some brands of premium eyepieces include Pentax, Tele Vue, and Nikon. A good eyepiece usually comes at around $100, but they can also be more expensive. For a telescope with an aperture of 100mm and a focal length of 1000mm, a good set of eyepieces is 32mm, 16mm, and 6mm.
Filters
Eyepiece Filters
There are several different filters you can buy. Some of them aim to block specific light wavelengths that are usually emitted by streetlamps or other terrestrial sources. Other filters can be used to block certain colors and increase contrast, while a polarized filter can reduce the luminosity of particularly bright objects, such as the Moon. Observing Jupiter using different filters will enhance certain bands and make the red spot easier to see.
Solar Filters
Solar filters fit directly onto the aperture of your telescope, reducing the amount of light that is gathered. There are two types of solar filters.
The first is the optical glass filter, which blocks most of the light coming from the Sun, providing a safe and comfortable viewing experience.
The secondtype of filter is a mylar filter, which, as the name suggests, is made of reflective sheets of mylar. While they are usually one-third of the cost of a glass filter, they give the Sun a blue or even a green color.
It is important to note that the price of these filters can increase rapidly with larger apertures. For a 6-inch telescope, the cost can easily exceed $100.
Accessories
The astronomy tools and instruments discussed above aren’t the only essential astronomy tools for an enjoyable evening of stargazing. You’ll also want to be prepared with the following useful accessories.
Interactive Sky Maps
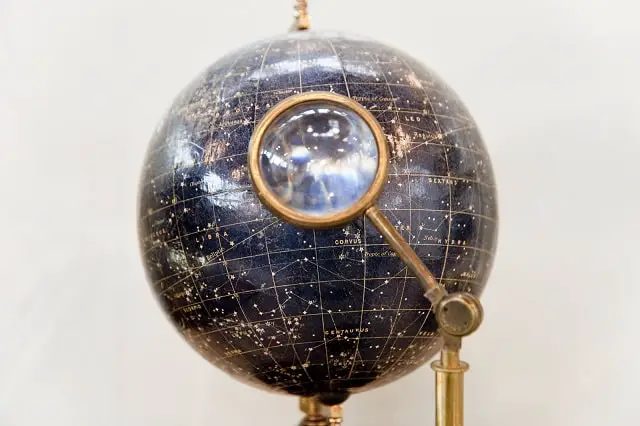
Back in the day when there were no smartphones or computers, the only way to learn the positions of the stars and Deep Sky Objects was by looking at an atlas or a sky map. Nowadays, you can download many interactive sky map apps on your smartphone, the most popular options being SkyView or Stellarium. These apps are extremely useful, as they now have a GPS function that allows you to discover what stars are in a given direction by just pointing your phone there.
Laser Collimator
If you choose a reflector or Schmidt-Cassegrain telescope, you will need to adjust the mirrors’ alignment every few months. You can do this in a few minutes with a laser collimator. They usually come at around $20-$30, but there are cheaper alternatives.
Finder Scope
Most telescopes come with some kind of seeing device with a large field of view that helps you point your telescope in the right direction before making a few last adjustments. The traditional answer is a finderscope with crosshairs, which works exactly like a miniature telescope. Other alternatives are red-dot finders and red-circle finders. Most telescopes have a finderscope included in the package. Should you want to upgrade your finderscope, be aware that there are plenty of options out there.
Red Flashlight
Red is the part of the visible electromagnetic spectrum with the longest wavelength and the least energy.5
For this reason, a red flashlight offers the least disruption to eye adaptation at night, compared to your normal phone light.
45-Degree Erect Image Diagonal
All telescopes give an image that is upside down and sometimes even flipped left-to-right. This is usually not corrected by telescope manufacturers since extra optics would reduce light throughput and give rise to aberration. Who cares what’s up or down in space anyway?
However, if you want to use your refractor telescope for daytime observation, you may want to get yourself a 45° erect image diagonal, which will correct both upside-down and left-to-right flips.
It might even come in handy when stargazing, as objects that are directly overhead will force you into uncomfortable positions unless you have a diagonal.
Warm Clothing, Towel, Snacks, and Music
Some observation nights can go on for hours, so make sure to wear appropriate clothing, or you won’t enjoy your time as much.
Stargazing can easily strain your neck and back, so bring a towel with you. You can lay down to relax your muscles and even do some more stargazing while you’re at it.
Do bring some snacks and good music, which will make for a better atmosphere and an overall enjoyable experience.
Flavio Salvati studies Physics at the University of Cambridge. He has written a book on astronomy, titled “Fundamentals of Astronomy. A guide for Olympiads.” During the summer holidays, Flavio has had the opportunity of working in the Quantum Matter group, in Cambridge, at the MagLab, in Florida, and the Max Planck Institute, in Germany. When he is not busy studying physics or astronomy, Flavio can be found playing Beethoven’s sonatas, fencing, or piloting a glider Schleicher K 21 above the fields of Cambridgeshire.
Additionally, if you’re looking for additional resources on stargazing, we have a number of articles that you might find interesting.
First off, we’ve created guides on a variety of astronomy related topics, such as our guide to determining how much a telescope should cost, our guide to how to use a telescope, our beginner’s guide to astronomy, and our guide on how to buy your first telescope. We’ve also created a series of helpful guides for kids, such as our list of astronomy facts (which any kids or beginners will no doubt find interesting), and our breakdown of astronomy for kids.
We’ve also created a series of buying guides, including our guide to find the best astronomy tools for you (which you’re reading right now), our guide to evaluating the best telescopes for beginners, and our guide to the best astronomy binoculars.
In addition to those guides, we’ve also created a series of in-depth reviews of a variety of telescopes and astronomy binoculars. You can check them out before you buy to find out the best accessories, pros and cons for different models, and even to see what they look like unboxed. If you’re considering buying a telescope we have a series of reviews that also serve as how to guides. You can get our series of guides to individual telescopes as well, including our review of the following telescopes and binoculars: our Celestron Firstscope review, Celestron Travel Scope 80 Telescope Review, SkyGenius 10×50 Binoculars review, Celestron Travel Scope 80 Telescope review, Opticron Adventurer II 10×50 Binocular review, Orion Astronomy 15×70 Binoculars review, Orion XT6 Dobsonian Telescope review, Orion Scenix 7×50 Binocular review, Celestron ExploraScope 114AZ Telescope review, Zhumell Z100 Telescope review, and our Sky-Watcher Heritage 130 Telescope reviews, to really be able to dive into the different telescope and astronomy binocular models.
Frequently Asked Questions
What tools do astronomers use?
Which tool is used to see planets?
How do you use astronomy tools?
What is the most important instrument used by astronomers?
Article Sources
Moon and Back uses only high-quality sources, including peer-reviewed studies, to support the facts within our articles. Read our editorial process to learn more about how we fact-check and keep our content accurate, reliable, and trustworthy.
- The Galileo Project. The Telescope. Rice.edu. http://galileo.rice.edu/sci/instruments/telescope.html. Accessed February 3, 2021.
- Pogge R. Lecture 26: Telescopes. Ohio-state.edu. http://www.astronomy.ohio-state.edu/~pogge/Ast161/Unit4/telescopes.html. Updated October 19, 2007. Accessed February 3, 2021.
- Abel PG. Absolute Beginners No. 3: A short introduction to some common types of telescope. The Journal of the British Astronomical Association. 2015;5:266-267. https://britastro.org/journal_item/6712. Accessed February 3, 2021.
- Ventrudo B. How to Choose Eyepieces for Your Astronomy Telescope. Agenaastro.com. https://agenaastro.com/articles/guides/eyepieces-binoviewers/choosing-eyepieces-for-your-telescope.html#focal. Published November 19, 2018. Accessed February 3, 2021.
- Morgan S. Light. Uni.edu. https://sites.uni.edu/morgans/astro/course/Notes/section1/new4.html. Accessed February 3, 2021.
Flavio Salvati studies Physics at the University of Cambridge. He has written a book on astronomy, titled "Fundamentals of Astronomy: A guide for Olympiads." During the summer holidays, Flavio has had the opportunity of working in the Quantum Matter group, in Cambridge, at the MagLab, in Florida, and the Max Planck Institute, in Germany. When he is not busy studying physics or astronomy, Flavio can be found playing Beethoven's sonatas, fencing, or piloting a glider Schleicher K 21 above the fields of Cambridgeshire.