If you’ve never owned or used a telescope before, it might seem a little daunting. Maybe you’ve already bought one and are excited to get started. (If you’re still searching, check out our guide on buying your first telescope for some great tips and learn how much you can expect to pay for a good telescope.)
What are all the parts called? What accessories do I need? Are they really as complex as they seem? The chances are they’re probably simpler and easier to use than you first imagined, and this guide is here to help you learn how to use a telescope at every step of the way.
You’ll learn:
- What the individual parts of a telescope are called
- How to set up your telescope
- What you can see on your first night under the stars
- What accessories you’ll need
- Which tips and tricks will help you get the most out of your telescope
What are the Parts of a Telescope Called?
If you’ve already bought your scope you may have already unpacked it and assembled it. That said, you may not have understood all the terminology the manufacturer used, so let’s review that before moving forward.
There are really three types of telescope; a refractor, a reflector or a compound scope (aka a catadioptric scope.)123
Regardless of which type you have, it will either sit upon a tripod or a box-like Dobsonian base.4
A tripod, of course, has three legs that can usually be extended to suit the height of the observer, so they’re useful if you’re stargazing with your kids. They can also fold inward to allow for easy transportation. The telescope itself will be attached to the tripod by either an equatorial or an alt-azimuth (or “altaz”) fork mount.56
Of the two, the equatorial mount is the more complicated. Every natural celestial object in the sky rises and sets at an angle. The equatorial mount tilts the telescope to match the angle of your target, thereby making it easier to track the object.
While this makes it slightly easier to follow your target as it rises and sets, it requires counter-weights and, as a result, can be both heavy and difficult for a beginner to set up and use correctly.
Conversely, an alt-azimuth fork mount is one of the simplest to operate. That’s because the telescope will move in a basic horizontal and vertical motion, making it easy to move the scope to your intended target.
With a fork mount, the telescope might be secured between two forks (so the mount has a U shape) or else attached on the side of the telescope’s optical tube to a single fork (a J shaped mount.)
All telescopes can utlilize either an alt-azimuth or equatorial mount with a tripod, but there’s a third type of mount that can only be used with a reflector.
If your scope doesn’t have a tripod, it’s almost certainly a reflector on a Dobsonian base. This alt-azimuth mount looks like a box and is usually on a circular base. The telescope sits between two forks, which are then attached to a base which swivels in a circular motion. It’s a little like a regular fork mount but without the tripod.
Being an alt-azimuth mount, the scope can move horizontally by turning the base, or vertically by tilting the scope up and down. As such, like an alt-azimuth mount on a tripod, the Dobsonian is very easy to use and an ideal choice for a beginner.
The big difference is that a Dobsonian effectively sits on the ground, with the eyepiece being lower as a result. With this in mind, Dobsonian mounts are designed to be used with larger reflector scopes that have a longer tube.
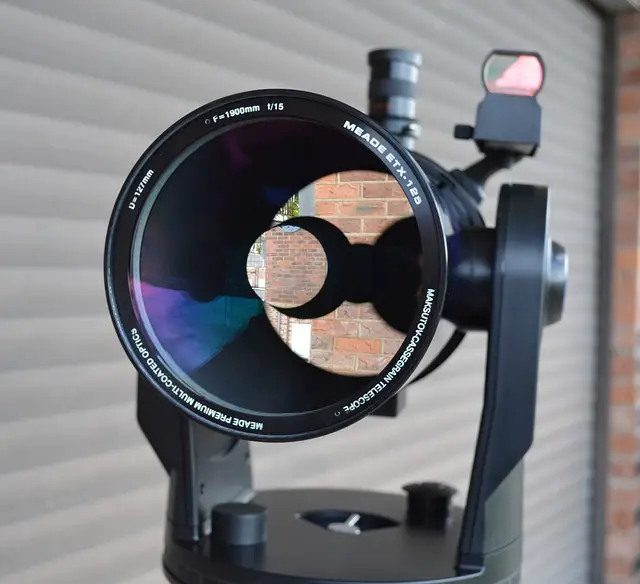
Let’s look at the optical tube, or optical tube assembly (OTA) itself. If you own a refractor or compound scope, it will have a lens at the end that faces the sky. If you own a reflector, that end will be open and there will be a mirror at the bottom of the tube.
A finderscope attaches to the side of the optical tube.7 This allows you to aim your scope at your target, thereby making it easier to find what you want to observe. Although the purpose of every finderscope is the same, there might be some differences between each one.
For example, many scopes come with a “red dot” finder. When powered on, these will have a red dot projected into the center of the finder’s field of view. The idea is that you move the dot over your target and it should then be visible when you look through the scope’s eyepiece.
If your finder doesn’t have a red dot, it’ll have crosshairs instead.
You’ll also find that some scopes come equipped with finders that will magnify the view a little. If this is the case, it’ll probably have a low magnification of around 5x or so. Most, however, will have zero magnification.
Unless you’ve bought an expensive first scope, the chances are you’ll have a red dot finder with zero magnification, as these are pretty standard for many scopes now. Even if that’s the case, it’s not a problem as it’s only meant to help you locate your target, rather than observe it! (This is worth bearing in mind, as some targets may be too faint to be visible in your finder, so you’ll need to make sure it’s centered where your target should theoretically be.)
Every telescope also has a focuser.8 This is the short tube that protrudes from the bottom of the tube on a refractor or compound scope, and near the open end of the tube on a reflector. This is also where you’ll insert your eyepiece and lean in to observe your target.
The focuser has two dials on either side and turning these will allow you to focus the view through the eyepiece.
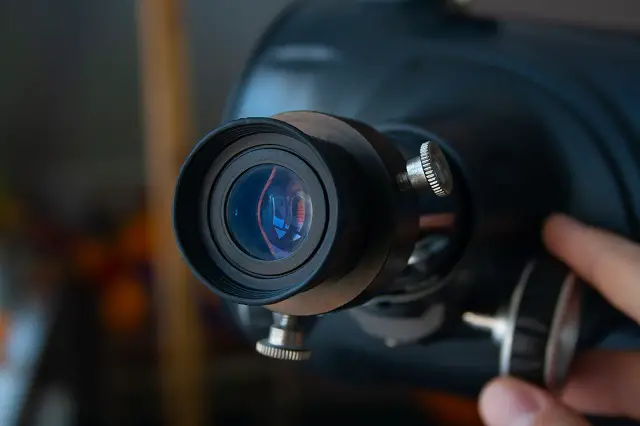
As for the eyepieces themselves, your telescope most likely came with two to get you started.9 The eyepieces slot into the focuser and you’ll notice there’s at least one small screw on the focuser you can tighten to hold the eyepiece securely in place.
Each eyepiece will have a measurement in millimeters printed on them, either somewhere on the barrel or near the top. We’ll discuss this measurement a little later, but for the time being you only need to know that the larger the number, the lower the magnification.
You might also notice that the larger eyepieces have a larger lens, and while these will provide a lower magnification, you’ll most likely find it more comfortable to observe with the larger eyepieces. Don’t worry, there’s a way you can double the magnification of an eyepiece without it becoming uncomfortable for your eyes. (Again, we’ll discuss this later!)
If you have a computerized GoTo telescope, there’s one other part that’s worth mentioning.10 Your GoTo will come with a hand controller, which will allow you to access the thousands of objects contained within your telescope’s database. You can also use the controller to slew the telescope both vertically and horizontally.
Incidentally, it’s worth knowing that you shouldn’t attempt to move a computerized telescope manually. Computerized scopes contain motors within the mount, and moving the optical tube with your hands can damage the motor. (It will also ruin your scope’s alignment, making it impossible for the scope to locate your target for you. If this happens, you’ll need to realign your scope before proceeding.)
How Do I Set Up My Telescope?
If you haven’t already assembled your scope, the best advice is to read the manual that came with it. Despite the various scopes having some similarities, every manufacturer and every model is a little different, making it almost impossible to create a one-size-fits-all assembly guide.
Incidentally, if you’ve lost your manual, you may be able to download a PDF copy from one of the links below:
Your scope probably also came with a Quick Start guide. That way, you won’t have to wade through pages of information, making this a better solution to get you up and running as soon as possible.
You’ll often assemble your scope from the ground up, and it’s a good idea to go through the process during the daytime, when the light is at its best. Don’t attempt to assemble your scope outside at night; not only is it difficult to read and see what you’re doing, but if you drop a part on the ground it can become easily lost in the dark!
There’s one other step you’ll need to complete before you can use your scope for the first time – aligning your finderscope – and again, it’s best to do this during the daytime.11
If you haven’t already, make sure your finder is attached securely to the optical tube and insert the lowest magnification eyepiece into the focuser. Remember, this is the eyepiece with the largest number printed on it.
Now aim your scope towards a distant terrestrial target, such as a building. Ideally, it should be something quite distinctive that you can easily identify through both the finder and the eyepiece. For example, a church or a building with a prominent sign along the side.
If you have a red dot finder, make sure it’s powered on before proceeding. Then use your finder as a guide to aiming your telescope; try to get your target in the center of the field of view. Then check the eyepiece and see how close the target is to the center there. You’ll most likely have to both focus it by turning the dials on the focuser and move the scope a little to center your target.
Once your target appears at the center, check your finderscope again. You’ll need to adjust the finder so that the target is centered here too. Depending on the finder, you may need to adjust the screws that hold the finder in place, or turn the small dials on the side of the finder itself.
If you have a red dot finder, the red dot should be centered on your target. Likewise, if your finder has crosshairs, make sure the target is at the center.
It’s a little tricky, but once your finder is aligned, you shouldn’t need to adjust it for some time. (It’s worth checking the alignment from time to time, but barring accidents, you should be good for awhile.)
Lastly, if you have a computerized GoTo scope, you’ll need to configure that too. For this you’ll need to be outside at night, and while each manufacturer is a little different, you’ll need to provide the following:
- Your location
- The data and time
- A maximum of three reference stars for the telescope
You’ll only need to provide your location once and you can choose from the telescope’s database or enter your latitude and longitude directly.12
Your scope will then store this information so that you won’t need to enter it again the next time you’re outside observing. (If you use your scope elsewhere you can always re-enter the information again.)
The date and time will need to be entered every time you use your scope. You may also need to specify whether your location is currently observing daylight savings time or not.
Finally, before you get started with any observing, you’ll need to point your scope towards two or three bright stars or planets. Without this step, your scope won’t know how to find any target in the night sky, as it won’t know in which direction it is pointing.
Don’t worry, you probably won’t need to know the stars to complete this step as your scope should be able to identify the stars based upon their positions in the night sky. Try to pick the brightest stars and avoid any that are near the Moon. Also, try to pick stars that are far apart in the sky and at different altitudes above the horizon.
Now you’re ready to go!
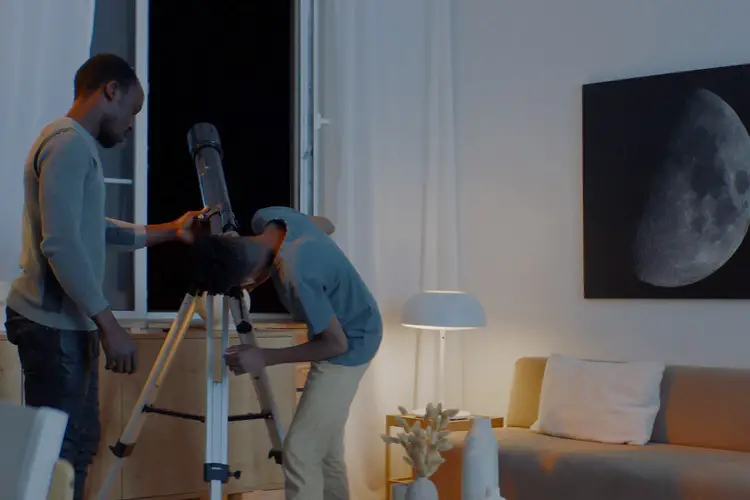
First Light on Your First Night

“First light” is the term astronomers use when taking equipment out under the stars and using it for the first time. It’s almost an astronomical rite of passage!
What should you look at on your first night under the stars with your new scope?13 As with everything, it’s best to start with something easy, and what could be easier than the Moon?14
If the Moon is visible, insert your lowest magnification eyepiece (again, the one with the largest number on the side) and aim your scope toward it. The best time to observe the Moon is when it’s either a crescent or close to being a half Moon in the sky. That’s when the shadows on the surface are at their best and the craters and mountains appear at their most spectacular.
And what a view! Even with a small scope and low magnification, it can take your breath away and is sure to amaze almost anyone who sees it. Be warned though: the Moon’s light can be dazzling, and it’s best to use a lunar filter if you have one. (More about that below.)
Next, or if the Moon isn’t visible, try for a planet.15 More specifically, try for Jupiter or Saturn if they’re visible. Check with a magazine, website or app to verify if this is the case, and then take a look.
You’ll be able to see the four largest moons of Jupiter (visible even with binoculars) plus the dark bands of Jupiter’s atmosphere streaking across its disc.16
Come back to Jupiter a few hours later (or the next night) to see how the positions of the moons have changed. As you become more experienced, you’ll be able to watch as the moons cast shadows upon the planet, disappear behind the world and then reappear as they emerge from out of Jupiter’s shadow.
Saturn can be a beautiful, mesmerizing sight, even for experienced observers. The rings are clearly visible in almost every scope, giving the world a 3D appearance that makes it seem as though the planet is an ornament inexplicably hanging in the blackness of space. You’ll also be able to see a number of Saturn’s brightest moons, but they’re fainter than Jupiter’s and don’t move as quickly.17
If it’s winter or early spring and you’re familiar with the constellation of Orion, there’s an outstanding sight you’ll be able to easily find. Firstly, look just to the lower left of the three stars of his belt, and you may see a tiny, misty patch. This is the Orion Nebula, a vast cloud of gas and dust where stars are being born.18
Take a look with your telescope and you’ll be able to see the cloud in greater detail; at first glance it will most likely appear gray, but keep looking and you may detect a greenish tint. At its heart is the Trapezium cluster, a tight grouping of young stars just two or three hundred thousand years old; in other words, these stars were just being born when homo sapiens first appeared upon the Earth.19
If you’re familiar with the Big Dipper, there’s an easy multiple star that’s a favorite with amateur astronomers as it’s visible for much of the year.20 Look closely at Mizar, the middle star in the dipper’s curved handle; can you see a tiny, faint star beside it?21 Assuming your skies are reasonably dark and you have good eyesight, it should be readily visible. This is Alcor.
Now point your telescope toward it and take a look with your lowest magnification eyepiece. You’ll see a third star nearby, helping to form a slightly obtuse triangle, but look at Mizar itself. The vast majority of scopes will split the star into two components, each being blue-white in color. This is actually a quadruple star system, with each of those two stars being made up of two more stars, making four in all.
And that’s not all. It’s well worth investigating further and learning more about all the different deep sky objects waiting to be found.22 There are many other multiple stars and nebulae visible throughout the year, not to mention open star clusters, globular star clusters, planetary nebulae and even galaxies.
The universe is quite literally above your head, just waiting to be discovered and explored!
What Accessories Do I Need?

Firstly, you’ll want to invest in a red flashlight.23 This might seem like an odd suggestion, but you’ll see more if you allow your eyes time to adapt to the dark. The last thing you want is for your night vision to be ruined by a regular, bright white flashlight. Red light, however, doesn’t affect your night vision and it’s worth investing in an inexpensive red flashlight so you can refer to books, magazines, and star charts without having your vision ruined.
Similarly, if your telescope didn’t come with one, buy a lunar filter. The Moon is bright and will dazzle you when you look at it through a telescope, even when it’s not full. A lunar filter is inexpensive and will block the vast majority of light, allowing you to observe and enjoy the Moon in comfort.
Your scope will come with at least one, but often two, eyepieces.24
Both will provide a different magnification (more about that below) but you’ll want to get more to increase the range.
Some objects, such as star clusters, often require a lower magnification, while other targets, such as the planets, will require a higher magnification. Multiple stars, however, often need a magnification somewhere in-between!
Be aware that some eyepieces can be expensive, but there’s an affordable solution that almost every amateur astronomer indulges in. A barlow lens works by multiplying the magnification of any attached eyepiece by a factor of 2x, 3x, 4x or even 5x.25 By using a barlow, you can effectively double the number of available magnifications.
Lastly, if you have a computerized GoTo scope, you’ll want to invest in an AC adapter (not to mention, most likely, an outdoor extension cable.) These scopes will eat up batteries, and the last thing you want is to lose the use of your scope in the middle of an observing session!
What Are Some Tips ‘n Tricks I Should Know?
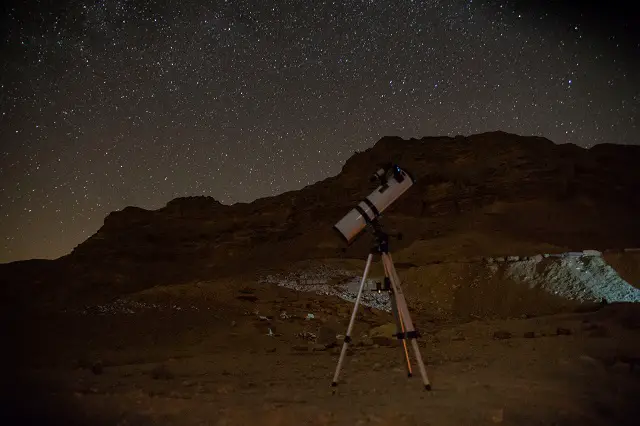
Firstly, allow your eyes time to adapt to the dark. This can take up to thirty minutes, but it’s well worth waiting as you’ll see far more stars as a result.26
You’ll also want to get as far away from the lights of a town or city as possible. In today’s world, this isn’t always easy, but light pollution is a serious threat to the night sky.27 For example, you might only be able to see a handful of bright stars from a city, but visit a rural location and you could see thousands.28
Regardless of your location, you’ll want to get to know the sky above you. Even if you own a computerized scope, it’s best to learn what to see and how to identify it, as your scope will only point you in the right direction.
To that end, you can download a free app for your phone, such as SkySafari, or install some free software on your computer (Stellarium being a fine example) that can help you to identify the stars and constellations. Alternatively, you can always read a book or learn from friendly fellow astronomers at a local club or even an online Facebook group.
Be sure to dress warmly; even summer nights can turn chilly, so be sure to wear layers and stay hydrated. (Incidentally, you may be relieved to hear that coffee does not dehydrate you!)29 You can also buy some small hand warmers that can conveniently fit inside your pockets and help to keep you warm all night.
In terms of eyepieces, you’ll want to know the magnification of each one. This will vary, depending on which telescope you’re using them with, but fortunately, there’s an easy way to find out. You should be able to find the specifications of your scope on the side of the optical tube (or in the user manual) and you’ll want to want to pay close attention to the scope’s focal length.30 This is the distance that light travels from the point where it enters the scope to the point where it exits the scope, via the eyepiece. Divide this number by the number printed on the eyepiece (the focal length of the eyepiece itself) and you’ll get the magnification.
For example, if your scope has a focal length of 700mm and you’re using a 10mm eyepiece, then you’ll get a magnification of 70x.
When you’re searching for an object, it’s best to use a low magnification, as this will provide you with a wider field of view. It’s much harder to find your target when you’re only looking at a tiny area of sky; it’s like looking at a small area of a map through a magnifying glass when you need to see the whole map to find your place of interest.
If your target is a nebula or a galaxy, it’s a good idea to focus on a nearby star rather than on your target. That’s because nebulae and galaxies are faint, misty objects that are difficult to focus on.
On a related note, when looking at fainter objects, try looking at them out of the corner of your eye. Called averted vision, this allows the more light-sensitive rods in your eyes to detect faint details that you’ll miss with direct vision.31 Similarly, the movement caused by tapping the telescope tube can help your eyes to detect objects that have otherwise eluded you.
Realistic expectations are a must. Maybe you became interested in astronomy after seeing the stunning images from Hubble, or even some of the amazing work produced by other amateur astronomers. These images are the result of a lot of processing using some expensive high-end equipment; you won’t, for example, see the beautiful colors that are often to be seen in the images.
That said, observational astronomy is more an exercise in both imagination and appreciation. It’s worth understanding what you’re looking at and appreciating the spectacle of it all. For example, the Orion Nebula is about 12 light years in diameter – that’s nearly three times farther than the nearest star to the Sun.
Every single star in the sky belongs to our own galaxy, the Milky Way, which itself contains some 100 billion stars. On any given night, under very clear, dark skies, you can see about 2,000 stars – just 0.00000002% of the stars in the galaxy. And there are thought to be at least two trillion galaxies in the universe.
Your first scope can’t show you every one, but it can bring you thousands of other fascinating deep sky objects within your reach. You only need a curious mind, an active imagination, your first scope and a bright star to steer her by!
Additionally, if you’re looking for additional resources on stargazing, we have a number of articles that you might find interesting.
First off, we’ve created guides on a variety of astronomy related topics, such as our beginner’s guide to astronomy, and our guide on how to buy your first telescope. We’ve also created a series of helpful guides for kids, such as our list of astronomy facts (which any kids or beginners will no doubt find interesting), and our breakdown of astronomy for kids.
We’ve also created a series of buying guides, including our guide to find the best astronomy tools for you, our guide to evaluating the best telescopes for beginners, and our guide to the best astronomy binoculars.
In addition to those guides, we’ve also created a series of in-depth reviews of a variety of telescopes and astronomy binoculars. You can check them out before you buy to find out the best accessories, pros and cons for different models, and even to see what they look like unboxed. If you’re considering buying a telescope we have a series of reviews that also serve as how to guides. You can get our series of guides to individual telescopes as well, including our review of the following telescopes and binoculars: our Celestron Firstscope review, Celestron Travel Scope 80 Telescope Review, SkyGenius 10×50 Binoculars review, Celestron Travel Scope 80 Telescope review, Opticron Adventurer II 10×50 Binocular review, Orion Astronomy 15×70 Binoculars review, Orion XT6 Dobsonian Telescope review, Orion Scenix 7×50 Binocular review, Celestron ExploraScope 114AZ Telescope review, Zhumell Z100 Telescope review, and our Sky-Watcher Heritage 130 Telescope reviews, to really be able to dive into the different telescope and astronomy binocular models.
Article Sources
Moon and Back uses only high-quality sources, including peer-reviewed studies, to support the facts within our articles. Read our editorial process to learn more about how we fact-check and keep our content accurate, reliable, and trustworthy.
- The Nine Planets. What is a Refracting Telescope? Nineplanets.org. Accessed March 17, 2021.
- Britannica. Reflecting Telescopes. Britannica.com. Accessed March 17, 2021.
- High Point Scientific. The pros and cons of catadioptric telescopes. Accessed March 17, 2021.
- The Backyard Gnome. How Does a Dobsonian Telescope Work? Thebackyardgnome.com. Updated May 29, 2020. Accessed March 17, 2021.
- Jones T. Equatorial Telescope Mounts: The Basics. Astrobackyard.com. Accessed March 17, 2021.
- Money P. A beginner’s guide to altaz mounts. Skyatnightmagazine.com. Published October 25, 2018. Accessed March 17, 2021.
- The Telescope Nerd. What is a Finderscope and how do you use it? Telescopenerd.com. Accessed March 17, 2021.
- Planet Facts. Focuser. Planetfacts.org. Accessed March 17, 2021.
- BBC Sky at Night Magazine. Telescope eyepieces: a beginner’s guide. Skyatnightmagazine.com. Published November 5, 2020. Accessed March 17, 2021.
- West A. Choosing a New Telescope – GoTo or not GoTo. Universetoday.com. Published February 11, 2011. Accessed March 17, 2021.
- Love the Night Sky. How to Align a Finderscope – A Simple Guide for Complete Beginners. Lovethenightsky.com. Accessed March 17, 2021.
- Simple Maps. Cities Databases by Country. Simplemaps.com. Accessed March 17, 2021.
- Night Sky Network. Night Sky Planner. Nightsky.jpl.nasa.gov. Accessed March 17, 2021.
- Astronomy. 10 tips for observing the Moon. Astronomy.com. Published December 13, 2019. Accessed March 17, 2021.
- Bakich ME. How to observe the planets with a telescope. Astronomy.com. Published April 1, 2014. Accessed March 17, 2021.
- Seronik G, Ashford A. Find Jupiter’s Moons – Interactive Observing Tool and App. Skyandtelescope.org. Published September 2, 2017. Accessed March 17, 2021.
- Ashford A, Fienberg RT. Find Saturn’s Moons – Interactive Observing Tool and App. Skyandtelescope.org. Published September 1, 2017. Accessed March 17, 2021.
- NASA. Messier 42 (The Orion Nebula). Nasa.gov. Published October 19, 2017. Updated December 2, 2019. Accessed March 17, 2021.
- King B. Star-Trapping in Orion’s Trapezium. Skyandtelescope.org. Published February 1, 2017. Accessed March 17, 2021.
- McClure B. Here’s how to find the Big Dipper and Little Dipper. Earthsky.org. Published March 7, 2021. Accessed March 17, 2021.
- McClure B. Mizar and Alcor, famous double star. Earthsky.org. Published March 25, 2020. Accessed March 17, 2021.
- Astro Junkies. Top 10 Small Telescope and Binocular Objects. Astrojunkies.com. Accessed March 17, 2021.
- Morgan S. Light. Uni.edu. Accessed March 17, 2021.
- High Point Scientific. How to Choose the Best Telescope Eyepieces for Stargazing. Highpointscientific.com. Accessed March 17, 2021.
- Richards S. What is a Barlow lens? Skyatnightmagazine.com. Published March 27, 2020. Accessed March 17, 2021.
- Caruso R. Why does it take so long for our vision to adjust to a darkened theater after we come in from bright sunlight? ScientificAmerican.com. Published August 13, 2007. Accessed March 17, 2021.
- International Dark Sky Association. Light Pollution. Darksky.org. Accessed March 17, 2021.
- Cool Cosmos. How many stars can you see at night? Caltech.edu. Accessed March 17, 2021.
- Zeratsky K. I’ve been seeing ads that say caffeinated drinks hydrate you as well as water does. Is this true? Mayoclinic.org. Published August 27, 2020. Accessed March 17, 2021.
- Lochun K. Telescope stats explained. Skyatnightmagazine.com. Published October 27, 2018. Accessed March 17, 2021.
- Mobberly M. Averted vision: how to get a better view of night-sky objects. Skyatnightmagazine.com. Published January 28, 2021. Accessed March 17, 2021.
Born in England, Richard J. Bartlett has had a passion for astronomy since the age of six. Besides being featured in Sky & Telescope magazine and previously having his own monthly column in Astronomy magazine, he’s written and published a number of books (US Amazon and UK Amazon) including several for Orion Telescopes. Now residing in southern California, Richard never misses an opportunity to stare at the stars.