It wasn’t too long ago that you’d be forgiven if you’d never heard of Zhumell. While popular companies such as Celestron, Meade and Orion have always dominated the amateur astronomy market, in recent years a few competitors have appeared to challenge them. One of those is Zhumell, but are their telescopes up to the task, or is Zhumell simply another wannabe contender? We tested the Zhumell Z100 tabletop Dobsonian to find out.
Our Score for the Zhumell Z100 Telescope
 Learn More |
Overall Expert Rating What we like: |
|---|---|
| Ease of Assembly | |
| Ease of Use | |
| Image Quality | |
| Accessories | |
| Value for Money |
All Photos Credit: Richard J. Bartlett
About the Zhumell Z100 Telescope
Packaging & Accessories
Zhumell’s packaging is functional, if nothing else. Unlike Celestron, the telescope isn’t shipped in an attractive box that their Marketing department has clearly spent some time designing. Arguably, of course, this isn’t an issue for many as you shouldn’t judge a book by its cover (or a telescope by its packaging) but there are those of us who feel it helps to build some excitement – especially when there are kids involved.
The exterior cardboard box measures 22.0 x 13.5 x 14 inches (55.9 x 34.3 x 35.6 cm) and weighs 10.4 pounds (4.7 kg). A second box containing the telescope and accessories is tightly packed inside, providing a decent amount of protection against any damage that might occur during transit.
A plastic bag covers the scope while cardboard packaging holds it and the accessory box in place.
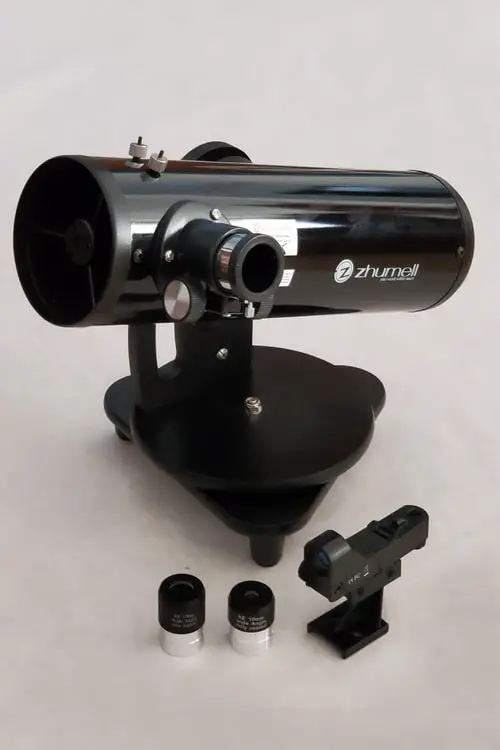
As far as accessories go, you’ll find the bare minimum inside:
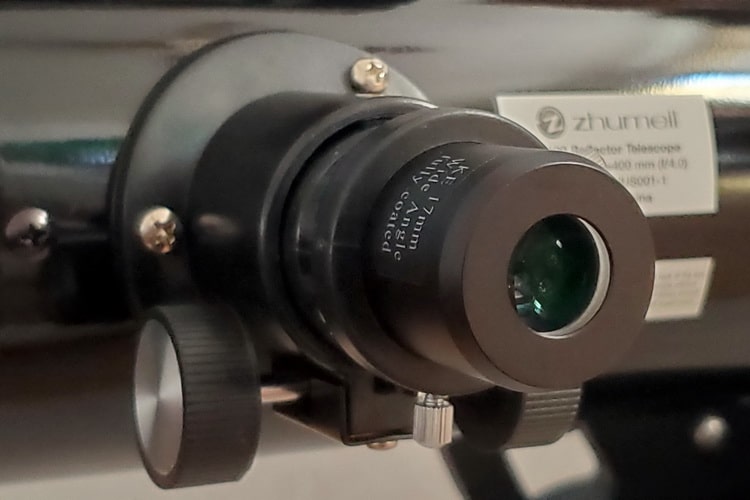
- 17mm eyepiece (1.25”, 24x)
- 10mm eyepiece (1.25”, 40x)
- Red dot finder
There’s no Barlow lens, no eyepiece tray, no smartphone adapter, no cleaning cloth, no free software and, unusually, no instruction booklet either. There is, however, a card inside the box to tell you the manual can be downloaded at zhumell.com/manual while the warranty information can be reviewed at zhumell.com/support (it’s not there – you’ll need to visit https://zhumell.com/pages/warranty-information instead.)
Quality & Durability
Do you even need instructions to assemble the Z100? Fortunately not, especially if you’ve owned a telescope – any kind of telescope – before, as it comes pretty much pre-assembled.
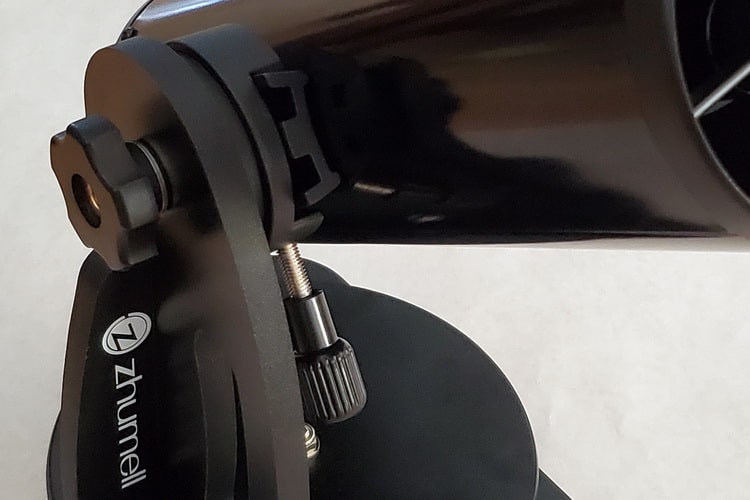
The Dobsonian base is already attached and you’ll notice that when you remove the telescope from its packaging, the optical tube assembly (OTA) has been packed so that it can’t be moved vertically. There’s a card holding the tube in place, but even once that’s been removed, you’ll see that the tube cannot be moved as its movement is blocked by the base.
In order to resolve this, you’ll need to turn the knob on the inside of the mount to allow the optical tube to move along the dovetail bracket that holds it in place. Once it’s in place and the tube can be freely moved vertically, you’ll need to tighten the knob again – otherwise, the tube could easily slide out of the bracket entirely!
Attaching and aligning the finderscope is simple enough, and again, if you’ve used a telescope like this before, this won’t present much of a challenge. However, since there are no instructions shipped with the telescope, first-time users will need to go online and download the PDF copy. You’ll find it in the Product Manuals section of Zhumell’s website, which can be found listed under Support at the bottom of the page.

Once you’ve found and downloaded the PDF instructions, you’ll find it’ll provide you with all the information you need.
It starts with an introduction before outlining the basic steps for cleaning and maintenance. There’s also a limited list of specifications and a parts list before the instructions explain how to attach the finderscope.
A section on using the eyepieces is next before a short explanation of altitude and azimuth, focusing the image and then aligning the finderscope.
The instructions here are very easy to follow, with some good additional info that newcomers might not be aware of. For example, it’s stated that refocusing is often required when changing eyepieces.
The last seven pages of the instruction booklet include a number of sections you’ll be hard-pressed to find in most other telescope instruction manuals:
- Observation Tips for Your Telescope
- Astronomy Formulas
- Astronomy Terminology
- Telescope Terminology
Many newcomers will no doubt find the Observation Tips particularly useful, as it covers topics such as selecting a viewing site, dark adapting your eyes, tracking celestial objects, selecting an eyepiece, and observing the Moon, stars, and planets.
All of this information is presented in a manner that’s straightforward, readable, and easy to understand, making this one of the better instruction manuals I’ve come across. It’s just unfortunate there isn’t at least a slip of paper with the scope notifying the user of where he or she can download it.
Assembling the Scope
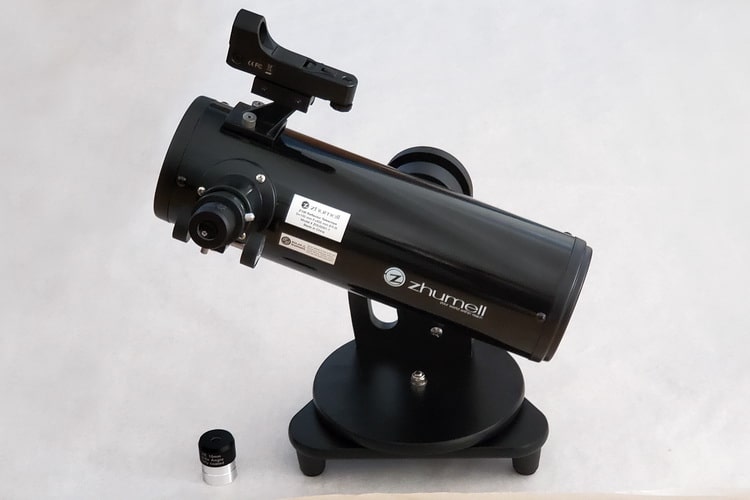
Constructed of wood and melamine (a nitrogen-based compound used in plastics), the Z100 feels pretty solid and sturdy. The base is wooden and, at a height of 11 inches (27.9 cm), is perfect for placing on a table or other flat surface outside.
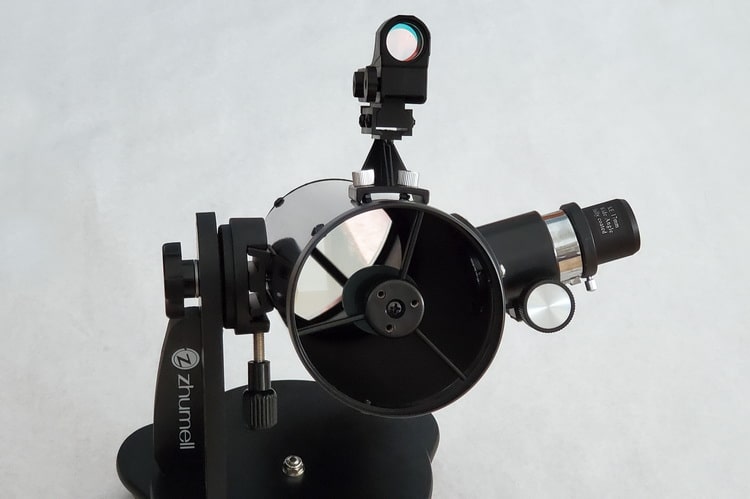
The Z100 has a parabolic mirror, which is better for astronomy than the spherical mirrors typically found in the smaller, inexpensive reflector telescopes. Parabolic mirrors have a single point of focus, so stars should appear as sharp points of light rather than appearing slightly distorted as you’d get with a spherical mirror.
The fact that Zhumell chose to use a parabolic mirror in this small, inexpensive reflector implies that the image will be correspondingly better too.
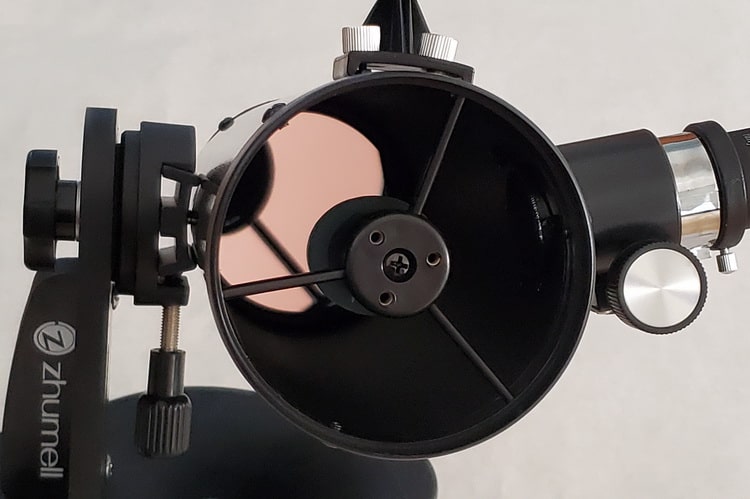
If you’ve had some previous experience with reflector telescopes, you’re probably aware that the primary and secondary mirrors may need some re-alignment over time. Re-aligning the mirrors is called collimation, and it can be done relatively easily by adjusting the thumbscrews at the bottom of the optical tube.
Unfortunately, the base of the Z100 optical tube has crosshead screws rather than the standard thumbscrews. This most likely makes it impossible (or at least very difficult) for amateurs to adjust the mirror themselves.
This isn’t necessarily a big problem for the casual observer, but anyone who wants to make heavy use of the telescope might want to take this into consideration.
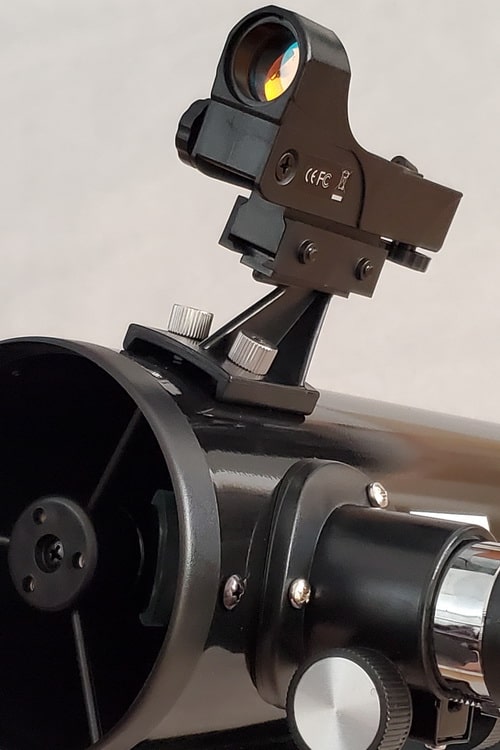
The finder is the same inexpensive red dot finder you typically receive with new scopes. There are no crosshairs, so you need to make sure the red dot is properly aligned if you want to easily locate your target.
The dot in question is actually an LED light and is powered by a small battery inside the finder. Again, anyone unfamiliar with this type of finder might need to download the PDF instructions first.
As with most things electronic, you’ll need to remove the plastic tab that separates the battery from the metal contacts inside the finder; otherwise, the LED won’t power on. Unfortunately, the battery had leaked in my finder and the contact inside was rusty and no longer functional as a result.
(To be fair, this could have been the result of high temperatures while the telescope was stored somewhere outside of the manufacturer’s control. Either way, I replaced the finder with an equivalent from Amazon.com and that worked just fine.)
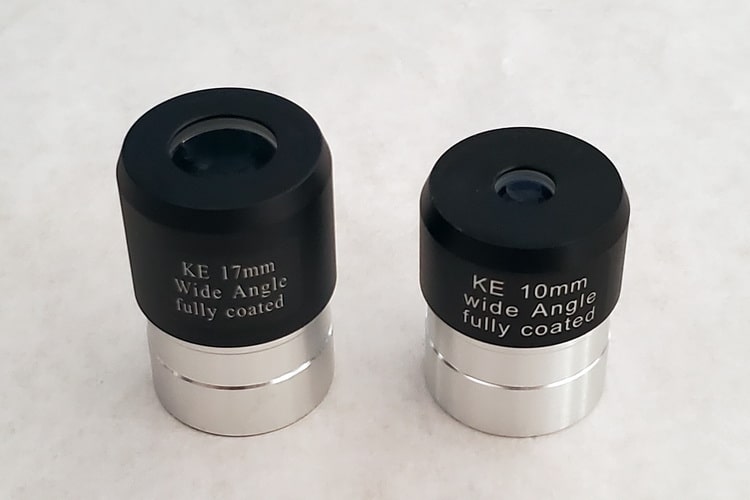
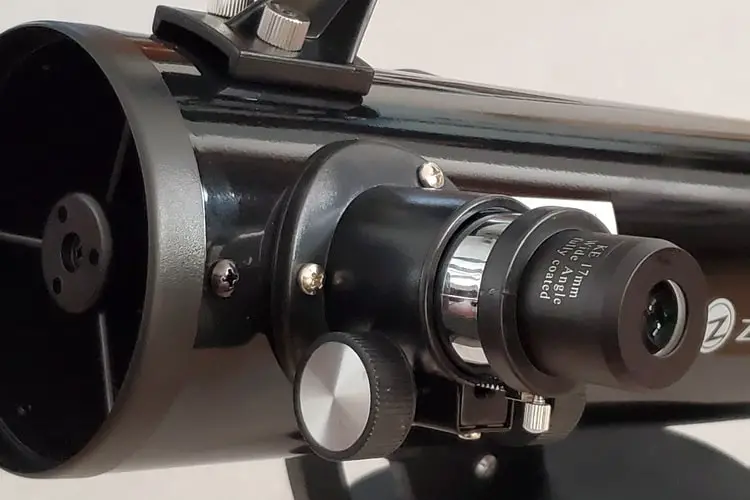
Likewise, the two eyepieces are pretty much the same standard as any others you’d receive with a new telescope. Both have 1.25” barrels with the larger having a focal length of 17mm (for a magnification of 24x) and the other having a focal length of 10mm (40x.)
That being the case, while these are not the highest quality, they do have a wider field of view than most of the standard eyepieces provided by other manufacturers. They also have aluminum housings, unlike some other manufacturers whose eyepieces have plastic housings.
Neither eyepiece has an eyeguard, so there’s the potential for light to intrude as you’re observing. However, if you’re prepared to cup your hands around the eyepiece as you look through it, it shouldn’t be too much of a problem.
For the most part, these are fairly minor issues as the eyepieces are only meant to get you started. The most important part of the telescope is the mirror as the eyepieces can be easily and relatively inexpensively upgraded.
Lastly, although there’s no Moon filter included, the eyepieces are both threaded to allow a filter to be attached.
Ease of Use
The great thing about a Dobsonian mount is that it’s one of the easiest to use, which makes it ideal for beginners. The base rotates horizontally while the scope itself swivels vertically, making it possible to turn the scope in any direction toward your target.
(Since this is not a computerized scope, you’ll need to make minor adjustments to compensate for the rotation of the Earth that causes celestial objects to rise and set. This is noticeable at higher magnifications as the target will appear to slowly drift across the field of view.)
The vertical position can be locked by tightening the knob on the side of the mount. However, with a Dobsonian mount there’s no way to lock the horizontal position, so you’ll need to be careful not to inadvertently move the scope once you’ve found your target.
This can easily happen when switching eyepieces, especially if you’ve tightened the focuser screws to hold the eyepiece in place. This wouldn’t be too much of a problem normally, except that the barrels of the eyepieces are grooved, making it a little harder to insert and remove. (Eyepieces with a smooth barrel are easier to use.)
The mount is 11 inches high and when the optical tube is pointed directly up at the sky, the total height is a little under 18 inches. This makes it a great option for smaller children, but adults might find it uncomfortable unless they have an adjustable chair or can put it on a higher surface.
On the flip side, its size makes it very portable. Since the scope is relatively small, its weight is correspondingly low too. Fully assembled, it’s just 6.7 pounds (3.0 kg), and with a handle carved into the base, it’s easily picked up and moved to a new location.
Lastly, again, the tips and terminology in the instructions will prove useful to beginners. There’s even a couple of blank pages at the back for notes, but if users are expected to download the manual and then print it, blank pages are something of a moot point.
Performance
Of course, the test of any telescope is how well it performs under a clear sky. Since most users of a small telescope don’t typically live under the dark skies of a rural location, the Zhumell Z100 was tested under suburban skies with a limiting magnitude of about 4.
Under these conditions, it should be easy enough to spot the brighter deep-sky objects, not to mention, of course, the Moon and planets.
In terms of the planets, both Jupiter and Saturn were within weeks of opposition and were therefore at their best and brightest for the year. With the 17mm eyepiece (24x) Jupiter showed a small, sharply defined bright disc with three of its four largest moons being seen on either side of the planet. (The fourth, Callisto, was not visible at the time.)
The 10mm eyepiece (40x) was able to show the north and south equatorial belts in the planet’s atmosphere, but neither of the polar regions could be seen. Since the disc was so bright, a filter may have helped to bring out more detail (especially if used with a Barlow lens), but overall the view was clear and the features were easy to see.
(You might be able to see Jupiter’s famous Great Red Spot with the Z100, but you’ll need to know when it’s visible and you’ll probably need a high magnification and – again – a filter to detect it.)
Seeing Saturn for the first time is always an unforgettable experience and the Zhumell Z100 certainly won’t disappoint. Even with the lower power 17mm eyepiece (24x) the rings were visible, with the planet itself appearing yellowish in color. Its largest moon, Titan, could easily be seen to the east.
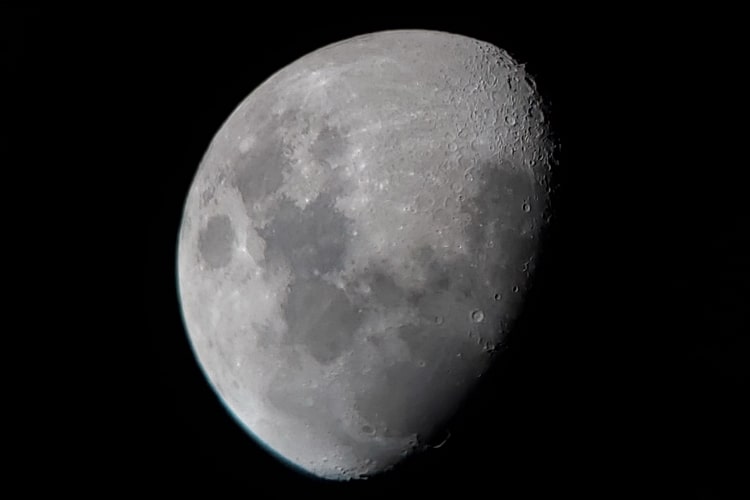
There was a lot of detail visible on the Moon, even with the low powered 17mm eyepiece (24x.) Features were sharply defined, with countless craters being clearly visible across the entire surface. There was also quite a bit of tonal variation visible (since there wasn’t any color visible, per se.)
The image above was taken on August 17th 2021 and shows the waxing gibbous Moon. It was taken with a Samsung Galaxy S10+ smartphone manually held up to the eyepiece, the 17mm eyepiece that came with the telescope and a Celestron neutral density lunar filter (not supplied.) Besides cropping, the image is unprocessed.
It’s worth noting that the actual view was far superior to the image presented here; for example, although the image shows a little chromatic aberration on the lower left edge of the Moon, there was none visible at the time (although the 10mm eyepiece did have some slight aberration.) In fact, it was probably one of the best views of the Moon I’ve seen in some time.
In terms of multiple stars, Albireo (Beta Cygni) was a clear split with the 17mm eyepiece at 24x. The primary appeared pale gold while its companion was sky blue. Both stars were sharp, with no distortion being apparent on either one.
Similarly, Cor Caroli (Alpha Canum Venaticorum) was also a clean (if tight) split with the 17mm eyepiece at 24x. Increasing the magnification to 40x with the 10mm made the pair more easily visible, with the primary appearing white and about twice as bright as the peachy-colored secondary.
The telescope also did a fine job with open star clusters. Ptolemy’s Cluster (M7) in Scorpius showed about 20 bright blue-white stars and a multitude of fainter stars with the 17mm (24x) eyepiece. The 10mm eyepiece (40x) also provided a nice view, although it appears aesthetically more pleasing at the lower magnification.
The Summer Beehive (IC 4665) in Ophiuchus also showed nicely with both eyepieces, with about 10-15 bright blue-white stars and a broad scattering of fainter stars being visible with the 10mm (40x) eyepiece.
Lastly, the Ring Nebula (M57) in Lyra could barely be seen with the 17mm (24x) eyepiece and could be very easily overlooked if you didn’t know its location or what to look for. The 10mm (40x) eyepiece improved the view a little, but not substantially.
Overall, both the eyepieces and the telescope itself performed very well. There was either very little or no chromatic aberration seen on any of the targets and the eyepieces provided a nice, decently wide field of view for a more comfortable observing experience.
(Since the apparent field of view for each eyepiece is unknown, the true field of view cannot be easily calculated. However, if we take an approximate value of 50 degrees for the apparent field of view, then the true field of view for the 17mm is roughly 2.1 degrees, while the 10mm eyepiece is roughly 1.3 degrees.)
Color was always good, and I was able to focus relatively smoothly and sharply. Regardless of the telescope, there’s always a little shake when the focus is adjusted, but this wasn’t too much of a problem with the Z100.
According to Zhumell, the theoretical maximum magnification is 200x, but realistically it’s probably somewhere between 100x and 150x – and it should be noted that increasing the magnification will also increase the shaking when adjusting the focus.
Target Audience

The Zhumell Z100 is really designed to be a family’s first telescope. Its size and weight make it portable and easy for young children to use, while older children and adults can easily locate potential targets with the Dobsonian mount. This makes it a great option for casual stargazing at family events and celebrations, with views that are sure to leave a lasting impression.
Specifications
- Type: Newtonian Reflector
- Mount Type: Alt-Azimuth
- Base: Dobsonian
- Computerized or Manual: Manual
- Aperture: 100mm (3.9”)
- Focal Length: 400mm (15.8”)
- Focal Ratio: f/4
- Included Eyepieces: 2
- Eyepiece 1: 17mm (24x)
- Eyepiece 2: 10mm (40x)
- Finderscope: Red dot
- Highest Useful Magnification: 200x
- Lowest Useful Magnification: 14x
- Limiting Stellar Magnitude: 12.7
- Resolution (Dawes): 1.2 arc-seconds
- Optical Coatings: Fully coated
- Optical Tube Length: 368mm (14.5”)
- Mount Height: 279mm (11.0”)
- Total Weight (Assembled): 6.2 pounds (2.8 kg)
- Warranty: Two Year Limited Warranty
What We Liked
- Excellent optics for the money
- Easy to use
- Very little assembly required
- Relatively lightweight
- Relatively wide field-of-view eyepieces
What We Didn’t Like
- Instructions had to be downloaded
- Lacking accessories
- Unable to collimate the mirrors
Final Verdict
Zhumell’s stated goal is to “put high-performance products in the hands of our customers” through “field-tested, precision-crafted optics at the best possible value.” For the most part, the Z100 succeeds, as you’ll find it hard to find such quality optics elsewhere for $100 or less.
That said, its short focal length of 400mm means its usable magnification is probably only between 100x and 150x. This is fine for large, bright objects, such as Jupiter, Saturn, multiple stars, and open star clusters. It could also be used for larger nebulae, such as the Orion Nebula, but many planetary nebulae, galaxies, and globular clusters won’t show well.
So if you want to upgrade your first scope and are looking for a solid, inexpensive, all-around scope that’s capable of producing fine views of almost everything, you might want to consider something larger (such as its big brother, the Zhumell Z130.)
If, on the other hand, you’re looking for a good quality, inexpensive, entry-level telescope the whole family can enjoy, then the Z100 will more than satisfy your needs – and with the Moon, planets, and hundreds of other celestial objects within your reach, you won’t be disappointed.
Recommended Accessories
- Zhumell 1.25″ Eyepiece and Filter Kit – if you’re looking for an all-in-one expansion kit for your Z100, then this is it. It includes four eyepieces, a 2x Barlow lens and five colored filters to help bring out details on the planets.
- Zhumell 2x Barlow Lens – a 2x Barlow will double the magnification of any eyepiece you attach to it. It’ll provide magnifications of 47x and 80x if used with the Zhumell Z100 and the eyepieces supplied with it.
- Celestron 1.25″ Moon Filter – pretty much an essential accessory, this filter reduces the glare of the Moon and allows you to observe it without being dazzled. It’s also “neutral density,” meaning that it produces a natural color view of the Moon, and is compatible with the Z100.
- Celestron PowerTank Glow 5000 – a red flashlight is also essential if you’re using star charts and books as it will protect your night vision. The PowerTank has three brightness levels and a USB port to charge your smartphone or tablet.
- Celestron Lens Cleaning Kit – dust can get everywhere, and it’s important to keep the optics of your telescope and eyepieces clean. This kit has everything you need to ensure you get the best views possible.
If you’re looking for additional general resources on astronomy, we have a number of articles that you might find interesting.
First off, we’ve created guides on a variety of stargazing areas such as our guide to find the best low cost telescope, our walk through of how to use a telescope (for beginners), our astronomy guide for beginners and our guide on determining the best type of telescope to buy for your first telescope. We’ve also created a series of helpful guides, such as our list of interesting facts about astronomy (which any kids or beginners will no doubt find interesting), and our breakdown of astronomy vocabulary for kids.
We’ve also created a series of buying guides, including our overview of the tools astronomers use, our guide to finding the best telescope for viewing planets and galaxies for beginners, and the best astronomy binoculars for beginners.
In addition to those guides, we’ve also created a series of in-depth reviews of a variety of telescopes and astronomy binoculars. You can check them out before you buy to find out the best accessories, pros and cons for different models, and even to see what they look like unboxed. If you’re considering buying a telescope we have a series of reviews that also serve as how to guides. You can get our series of looks at astronomy tools, including our contribution to: Celestron Firstscope telescope reviews, Orion XT6 Dobsonian Telescope reviews, Sky-Watcher Heritage 130 Telescope reviews, Celestron ExploraScope 114AZ Telescope reviews, SkyGenius 10×50 Binocular reviews, Orion Scenix 7×50 Binocular reviews, Orion Astronomy 15×70 Binocular reviews, Opticron Adventurer II 10×50 Binocular reviews, Celestron Travel Scope 80 Telescope reviews, and the Celestron SkyMaster 20×80 Binocular reviews to really be able to dive into the different telescope and astronomy binocular models.
Born in England, Richard J. Bartlett has had a passion for astronomy since the age of six. Besides being featured in Sky & Telescope magazine and previously having his own monthly column in Astronomy magazine, he’s written and published a number of books (US Amazon and UK Amazon) including several for Orion Telescopes. Now residing in southern California, Richard never misses an opportunity to stare at the stars.