If you’re one of the millions of people who enjoy camping and looking up at the stars, then Celestron may have the perfect telescope for you. The Celestron Travel Scope 80 has been designed to be as lightweight and portable as possible, without making any sacrifices in quality. Have Celestron achieved their goal, or is the perfect scope for camping still a dream?
Our Score for the Celestron Travel Scope 80 Telescope
 Learn More |
Overall Expert Rating What we like: |
|---|---|
| Ease of Assembly | |
| Ease of Use | |
| Image Quality | |
| Accessories | |
| Value for Money |
All Photos Credit: Richard J. Bartlett
About the Celestron Travel Scope 80 Telescope
Packaging & Accessories
Celestron always puts care and attention into their packaging, and while this might seem like a minor point, it goes to show that Celestron takes the presentation of their products seriously.
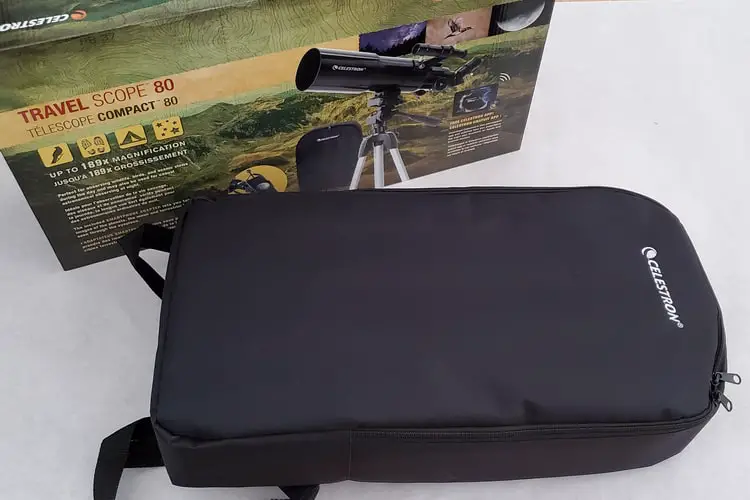
The packaging for the Travel Scope 80 is no exception, with colorful imagery and an attractive design that’s sure to get kids excited. The box itself is sturdy and should provide adequate protection for the contents. Lifting the lid of the box will reveal the backpack inside, wrapped in tissue paper.
The telescope and accessories can be found securely packed inside the backpack and are wrapped in bubble wrap and tissue paper for additional protection.
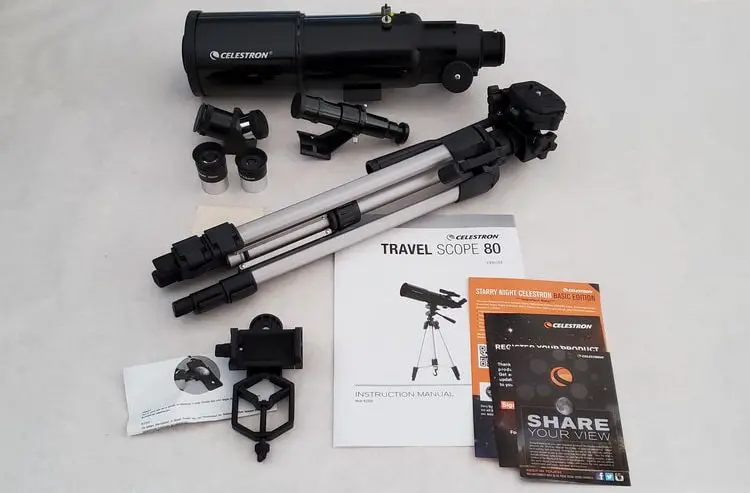
Besides the backpack, you’ll also find:
- The telescope itself
- A tripod
- A finderscope
- A 45 degree erect image diagonal
- Two eyepieces (20mm and 10mm)
- A smartphone adapter
- A download code for Starry Night Basic
- A cleaning cloth
- An instruction booklet
Incidentally, the specs on Celestron’s website state that an accessory tray is included with the telescope, but this wasn’t the case. No mention is made of it in the product description and Amazon doesn’t list a tray as being included either, so it must be assumed that the website is in error.
Also, unlike some of Celestron’s other scopes, there’s no barlow lens included. A barlow lens acts like a magnifier for any eyepiece used with it. By inserting an eyepiece into the barlow and then inserting the barlow into the telescope focuser, you can increase the magnification of the eyepiece by 2x, 3x or even 5x.
Although there’s no barlow included with the Travel Scope, this isn’t necessarily a problem as they can be bought online for a low price. For example, Celestron’s Omni 2x Barlow is a great, inexpensive option.
However, Celestron has included two items that could prove useful for anyone looking to get the most out of their telescope. Firstly, there’s the smartphone adapter. This allows you to attach almost any smartphone to the telescope and capture images and video of what you see through the eyepiece. The adapter has a retail value of $19.95
It’s also worth pointing out the software you get for free with this telescope. Starry Night is a respected planetarium program that allows you to view the night sky and get ideas for targets to observe with your telescope. You’ll get a download code for the Basic version, worth $49.99, giving this telescope package additional value for money.
The 11-page instruction booklet provides details on how to assemble the telescope and includes photos to help you. There are also three short General Observing Hints at the back, with an emphasis on terrestrial rather than astronomical observing, and a note to the effect that while the telescope is designed for terrestrial use, it can also be used for “casual astronomical observing which will be discussed in the next section.”
Unfortunately, the bottom half of this page is blank, and the astronomical section is missing entirely, as are the specifications for the equipment. While neither one is essential, it would be nice for Celestron to have included the information, especially since the astronomical section has been specifically mentioned and users might well be expecting it.
Quality & Durability
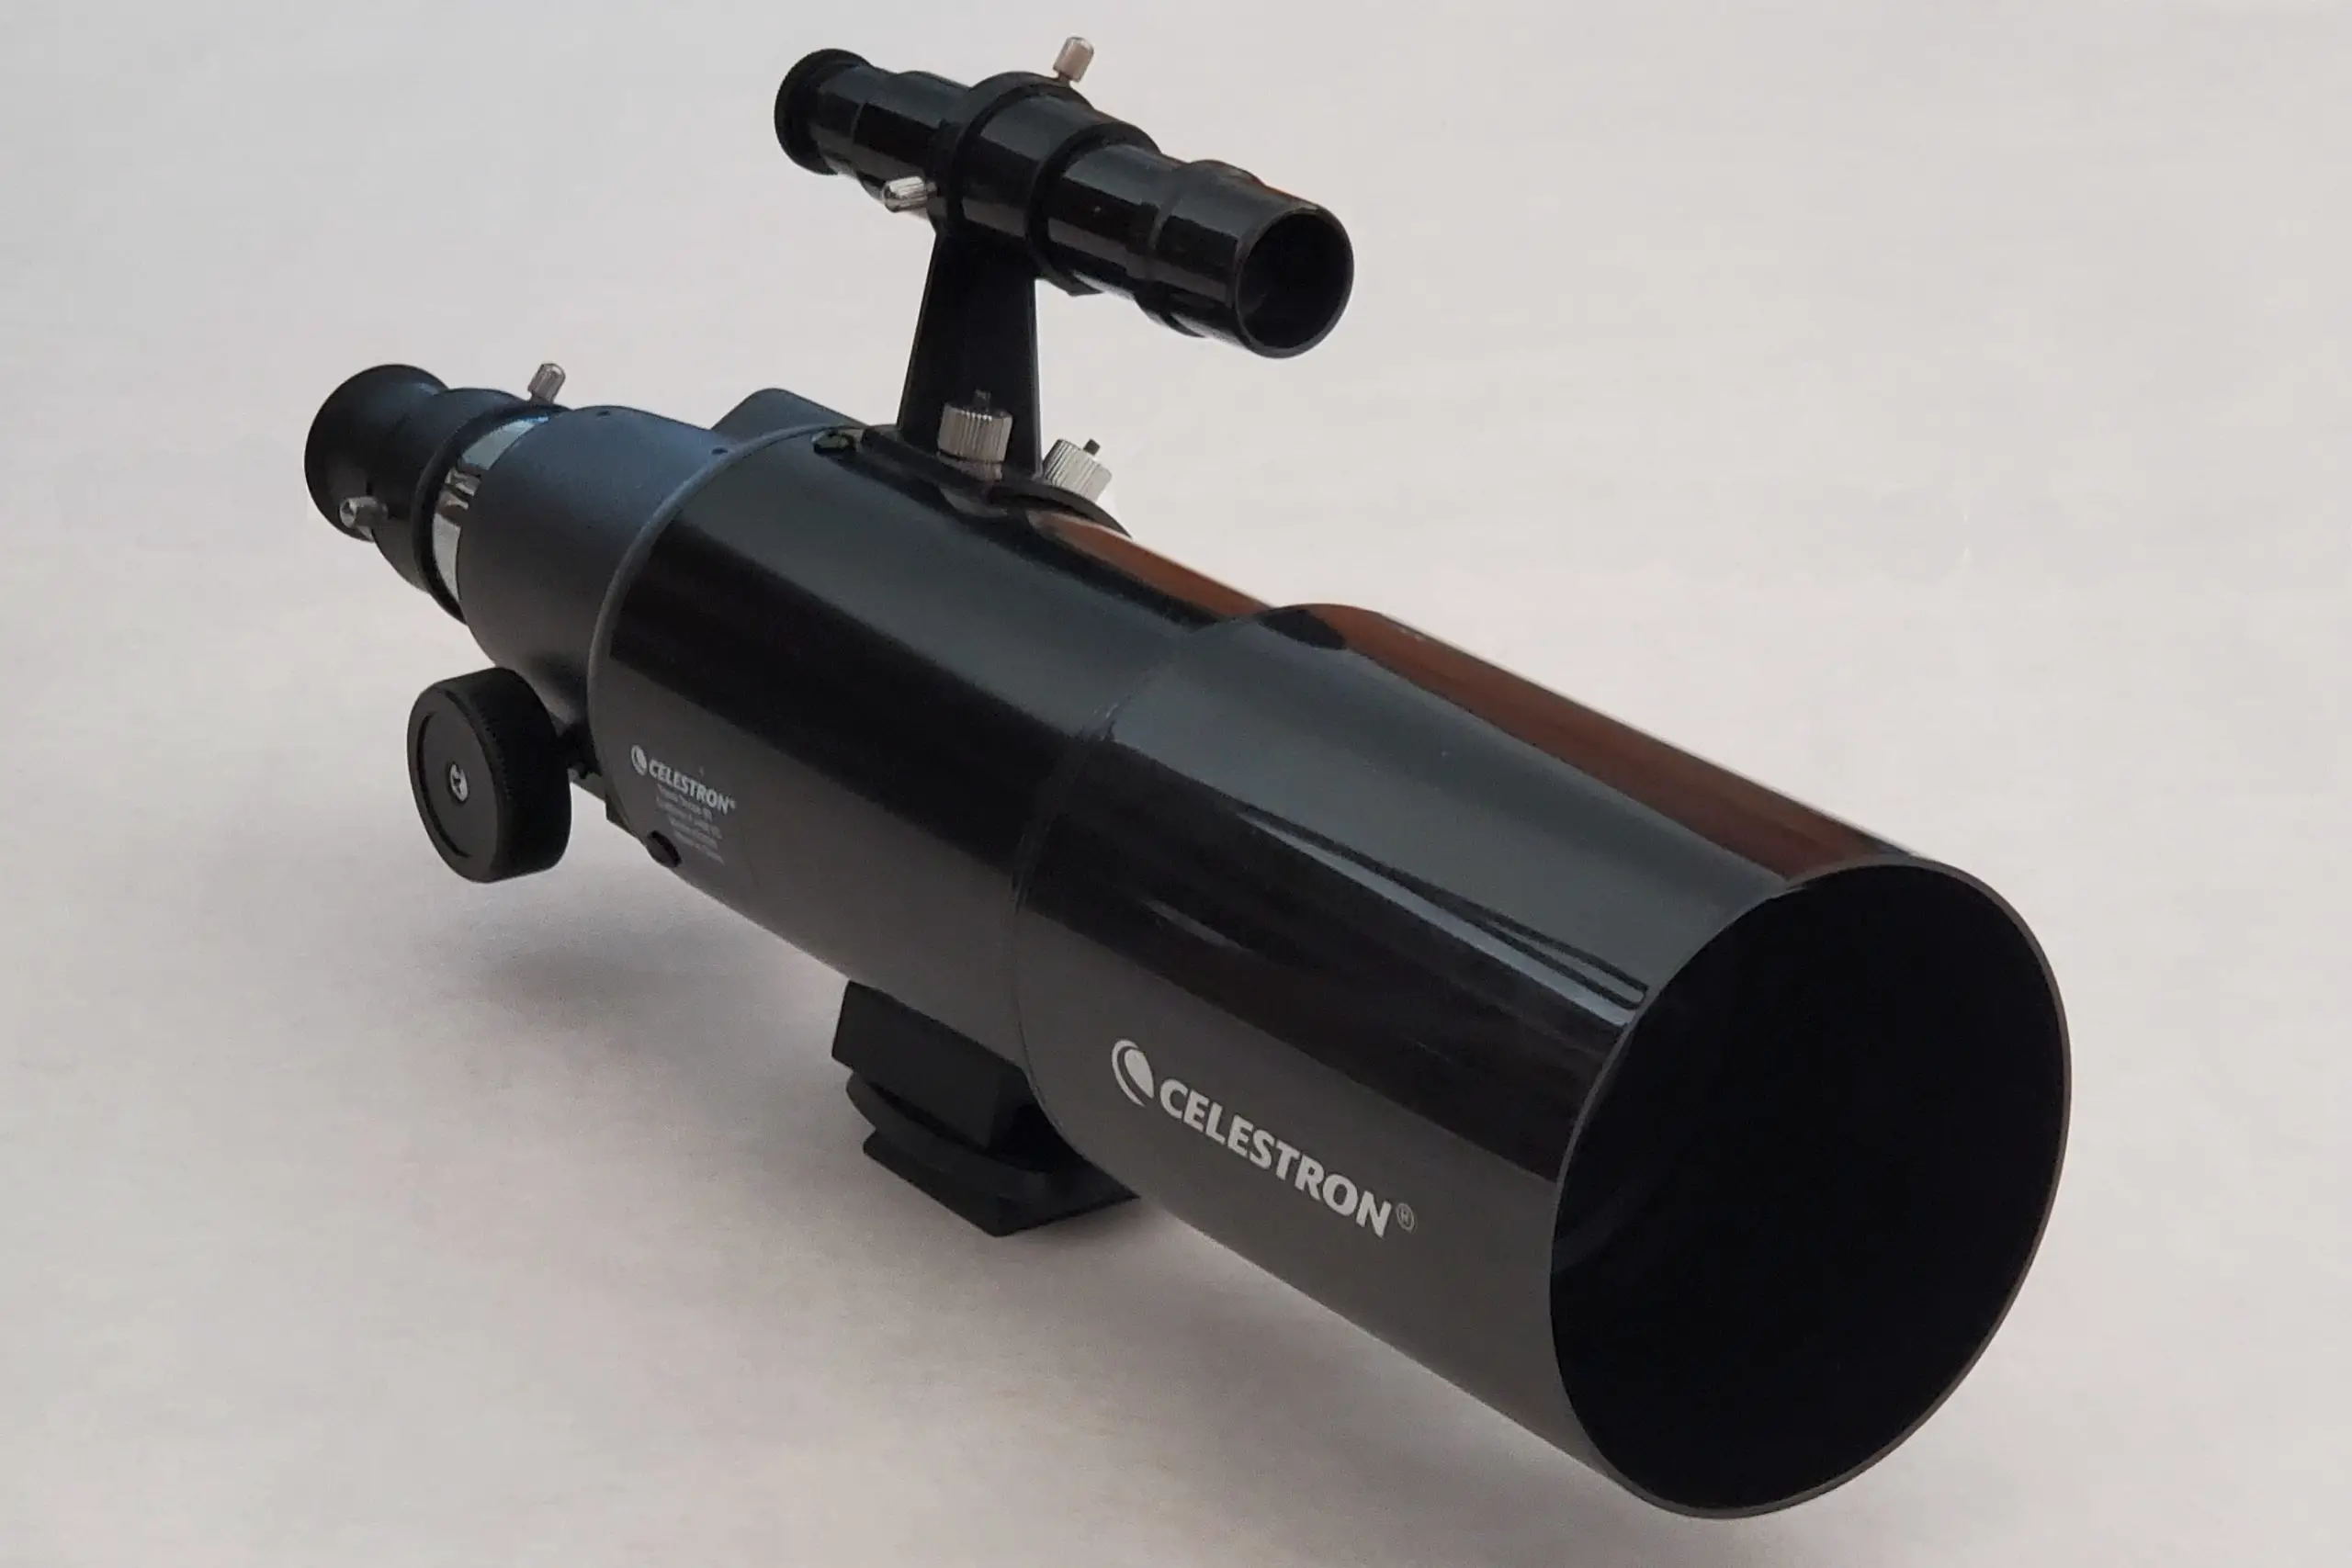
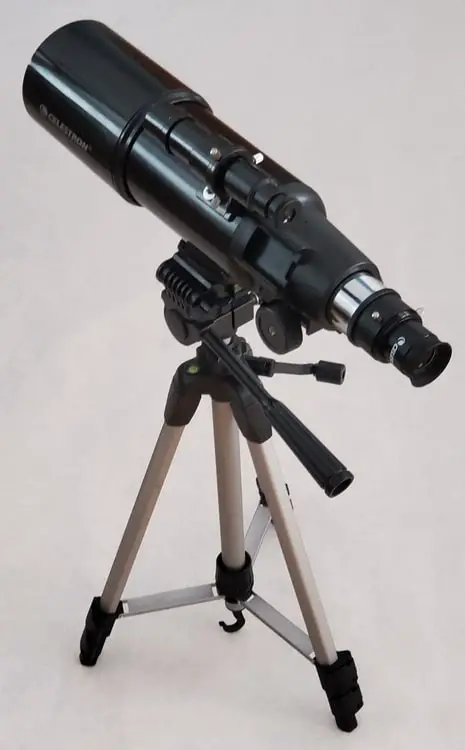
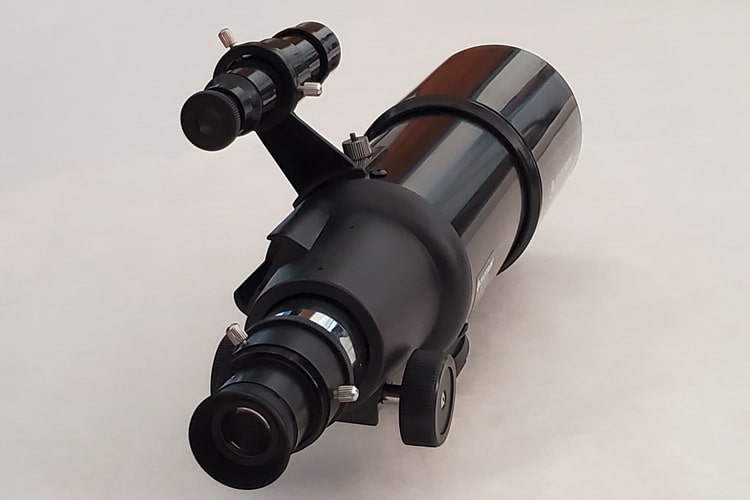
Despite the relatively low price of the scope, you might be forgiven for thinking that you’d be getting correspondingly low-quality optics, but fortunately, that’s not the case. Celestron has a reputation for quality optics and the Travel Scope 80 is no exception.
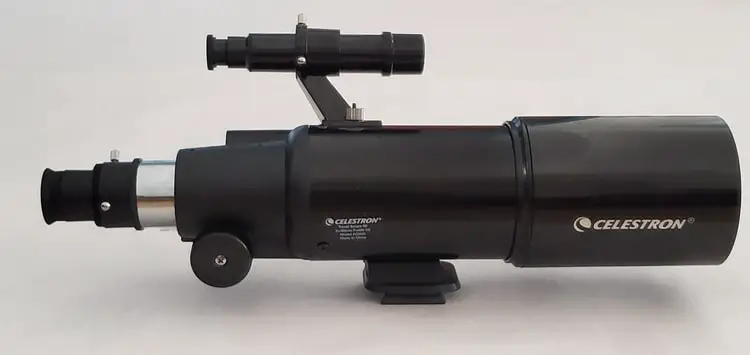
The telescope itself (also known as the Optical Tube Assembly, or OTA) is made of aluminum and is 457mm in length. The aperture (ie, the lens) is 80mm in diameter, while the height, from the adapter that attaches to the mount to the top of the finder, is just under 191mm. It has a focal length of 400mm and weighs 2.4 pounds.
The optics are fully coated (similar to the lenses on binoculars) and there’s also a standard CG-5 dovetail slot if you want to replace the original finder.
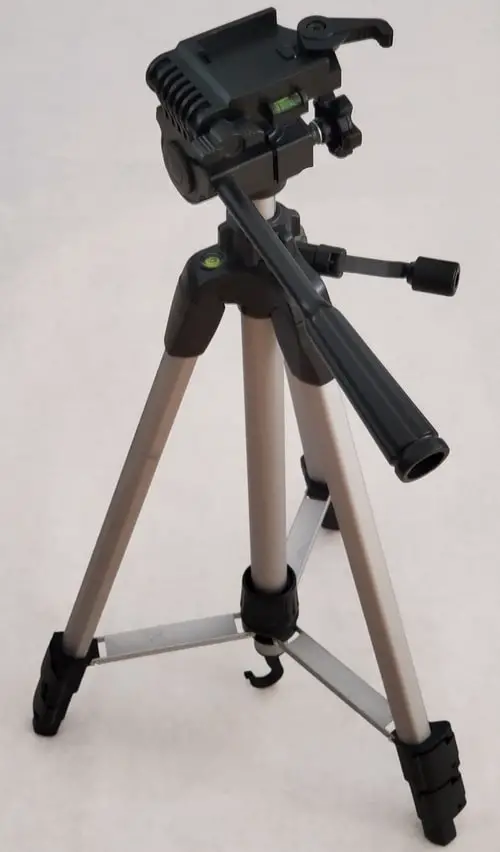
The tripod, like the telescope optical tube, is made of aluminum. At 1.8 pounds, it weighs less than the telescope and can be easily collapsed and transported to another location. (The total assembled weight is 4.2 pounds.)
It’s a standard photographic tripod that can also be used with a DSLR, smartphone, or binoculars, although you’ll need to purchase an adapter if you want to attach any other optical equipment. Unfortunately, Celestron’s website makes no mention of the maximum load weight.
There’s a quick-release mounting plate that securely holds the equipment in place, but be careful not to accidentally move the release lever as whatever is attached will drop to the floor!
Lastly, there are two small levels – one at the top of the legs and the other on the mount – that can help to ensure the tripod is on an even surface.
As far as the supplied finder goes, it’s pretty basic but should be fine for terrestrial observation. It has an aperture of 24mm and a magnification of 5x, making it easier to locate objects that would normally elude the naked eye. The finder also has crosshairs that many observers will prefer over the more common red dot finders that are regularly supplied with other scopes.
The supplied diagonal is what’s known as an erect image diagonal. Usually, a refractor telescope will flip and reverse the view of the object; this is due to the configuration of the lenses within the telescope. An erect image diagonal corrects this, thereby making it possible to observe terrestrial objects.
While it’s not the highest quality diagonal on the market, it’ll work perfectly well with the Travel Scope or almost any other refractor you own.
The two eyepieces are 1.25” Plossls of standard quality, so while they’re fine for use with any compatible telescope, if you want a better quality image, you’ll need to buy a better quality eyepiece,
The magnification of each eyepiece is easily calculated by dividing the focal length of the telescope (400mm) by the focal length of the eyepiece. The larger eyepiece has a focal length of 20mm, while the smaller is 10mm, producing magnifications of 20x and 40x respectively.
The smartphone adapter is Celestron’s basic model and works with any eyepiece with an outside diameter of between 29mm and 45mm. It should also be able to fit most smartphones, including the Apple iPhone and Samsung Galaxy (although you may need to remove the case.)
The soft backpack is really meant to carry your telescope and accessories rather than protect them. It measures 20 inches in height, 11 inches in width, and is 4 inches deep. There’s a relatively shallow pocket on the inside but no outside pocket, which, arguably, is where it could be most useful.
There’s a wide band that goes across the optical tube and tripod that also has two small pockets, and while you could fit filters inside, neither of them have a zipper or flap to close the pockets and you risk having the contents fall out as a result.
The band won’t do much to protect your scope or tripod either, and while there are velcro straps to hold them in place, both are too long to hold either the telescope or tripod securely. There’s no way to adjust the straps either, so both the tripod and the telescope will be loose. One solution is to apply your own velcro patch to the straps so they can adequately hold the equipment in place.
Similarly, the pockets don’t have much room for the eyepieces, star diagonal, and smartphone adapter, leaving you with either having them loose at the bottom of the backpack or having to bring along a second case for the accessories.
Assembling the Scope
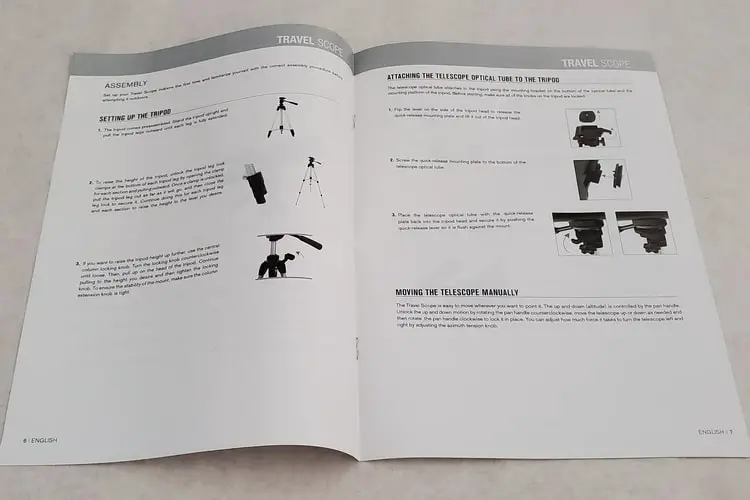
One of the best things about the Travel Scope 80 is the ability to quickly and easily assemble it. Once you know what you’re doing, you’ll be able to put it together in about two to three minutes (although aligning the finderscope will take longer.)
The tripod height can be adjusted from 22” (559mm) to 52” (1321mm) by extending the legs and the central column. Each leg has two clamps that allow you to extend and then lock the leg to the desired height. There’s also a central column that can be raised to bring the tripod to its full height.
The instruction booklet mentions loosening the central column locking knob to raise the column, but the image depicts a handle. The knob only locks the central column in place, while the handle needs to be turned clockwise to raise the column.
On the scope I received, the only way to raise the column was by turning the handle, but the text of the instructions didn’t mention anything about it.
A word of warning: be careful when turning the handle to adjust the height of the column. Turning the handle clockwise will raise the column, while turning it counterclockwise will lower it. However, if you accidentally turn it counterclockwise when the column is fully retracted and the knob is loose, the column will continue to retract, pushing the mount off the column in the process.
This isn’t a huge problem in itself, as the mount can be pushed back onto the column again, but if your equipment is attached to the mount at the time, it could cause some serious damage.
(It may be simply a fault with the tripod I received, but without another Travel Scope to test it’s impossible to say for sure.)
The trickiest part of assembling the scope is aligning the finderscope so that when your target appears in the center of the finder crosshairs it also appears in your eyepiece. You’ll need to do this during the daytime by first sighting a terrestrial target (for example, a distant building) through the main scope. You’ll then need to adjust the three screws of the finder so that your target appears at the center.
There’s a trick to this that’s worth bearing in mind. The finder is wider at the lens end, so be sure to push the finder all the way through the holder until it won’t move any further along. It should be fairly tight, but you’ll still be able to move it slightly. Now you can adjust the screws so that the target is at the center of the crosshairs and the finder is firmly in place.
If you intend to store the telescope in the backpack, you can either leave the finder attached to the optical tube or remove it. Either way, it’s almost impossible to put the scope in the bag without knocking the finderscope, which means you’ll need to realign it again. The alternative – removing the finderscope completely – obviously has the same end result.
Ease of Use
Since the Travel Scope 80 is mounted to a regular photographic tripod, the telescope is very easy to use. By moving the panhandle in a horizontal or vertical motion you can easily aim the telescope at your target. Once you have it in your sights, the vertical axis is locked by turning the panhandle while the horizontal axis is locked by tightening the knob on the side of the mount.
Realistically, the tripod is a little short to comfortably use the finderscope, even with the tripod extended to its full height. You’ll need to either bend over or crouch slightly to see through it, which can obviously be an uncomfortable experience.
Being lightweight, the tripod itself feels too light and flimsy; as I aimed the scope I found the tripod could be easily tipped over. Aiming the telescope also causes the finderscope and eyepiece view to shake; you’ll find yourself unconsciously placing your fingers on the optical tube to steady it.
Once you’ve centered your target, you can lock the optical tube in place to prevent the tube from moving. Unfortunately, locking the scope also causes the optical tube to move slightly to the left and upward, resulting in your target potentially disappearing outside of the eyepiece field of view.
Again, like the similar issue with the finderscope, this isn’t an uncommon problem, but it can make targeting a tricky and frustrating experience.
You’ll need to make sure the scope is tightly locked in place, as the optical tube can be easily moved and adding accessories (such as a heavy barlow lens or eyepiece) will cause the focuser end of the tube to drop.
The 45 degree diagonal is used to make observing a little more comfortable. After inserting an eyepiece and attaching the diagonal to the end of the telescope, you’re then able to turn the diagonal so that the eyepiece is at a more convenient angle.
This allows you to look through the eyepiece without having to contort yourself. This is especially useful when your target is nearly overhead and the eyepiece would otherwise be pointing at the ground!
In terms of the free smartphone adapter, this was also tricky to set up and use. The instructions state that it can be used with most cell phone cases, but the reality is that you’ll probably need to remove it.
The biggest problem with the adapter lies in aligning the smartphone camera with the eyepiece, as this can be fiddly to say the least. To achieve this, you’ll need to adjust the screws and move your phone until the view through the eyepiece can be seen on your smartphone screen.
It sounds simple enough in principle, but you could find yourself moving everything around for quite some time before you get the result you want.
Here are some pointers to help you (that aren’t in the instructions):
- Use the eyepiece with the longest focal length. The longer the focal length, the wider the eyepiece lens and the easier it is to align the smartphone. In the case of the Travel Scope 80, this is the 20mm eyepiece.
- Folding the rubber eyepiece eyeguards down will allow your smartphone’s camera to get closer to the eyepiece lens.
- Make sure the telescope is firmly locked into position, as the additional weight of the adapter and smartphone will easily drag it down.
- Don’t tighten the screws all the way when aligning the smartphone and the eyepiece. By allowing a little movement you can fine-tune the camera placement for the best view.
- Zoom in with your smartphone’s camera to minimize vignetting, but be aware that the more you zoom, the lower the quality of the image.
- Use your camera’s shutter delay setting (if it has one) or a bluetooth remote to avoid shaking the camera and telescope when taking the picture. A ten second delay should be fine.
Performance
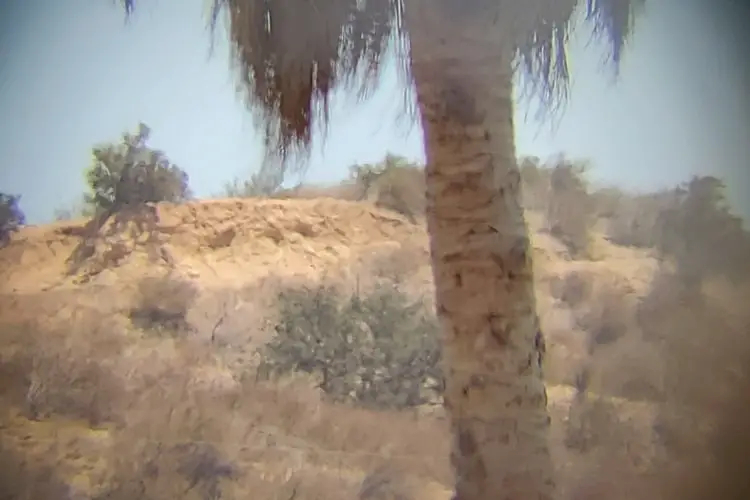
The first thing you should be aware of (especially if you’re using the telescope for astronomy) is that the Travel Scope 80 produces an erect image. This means the image appears upright, and not inverted or flipped, as you’d expect on a dedicated astronomical telescope. In order to achieve this, an additional lens is usually added, which reduces the image quality.
While an erect image is best for terrestrial viewing, it’s not ideal for astronomy, which requires the best possible image in order to see as much detail as possible. What’s odd is that the view through the finder is inverted, potentially causing some confusion when trying to both align the finder and target an object.
The finder itself performs well enough for daytime, terrestrial observations. It’s not the greatest but it serves its purpose. Both eyepieces had good color and produced good images of terrestrial objects. There was no noticeable chromatic aberration with the 20mm (20x magnification) but some slight aberration occurred around the edge of the field of view with the 10mm (40x magnification.)
In terms of astronomical targets, the Travel Scope 80 provides a good view of the Moon, with craters in shadow providing a sharp contrast to the sunlit surface. Earthshine, where the darkened, unlit portion of the Moon’s surface is visible, is also worth a look.
According to Celestron’s website, the Travel Scope 80 has a theoretical maximum magnification of 189x, but to achieve this you’d need to use an 11mm eyepiece and a 5x barlow. It also has a stellar magnitude limit of 12 and a Dawes limit of 1.45 arcseconds.
Unfortunately, this might be a bit of a stretch, and if you’re looking to use the scope for astronomy, you’ll need to make some adjustments.
The problem isn’t so much with the optical tube, but rather with the tripod and finder. The finder just isn’t up to the standard needed for observing fainter objects. More specifically, bright stars and the Moon appear blurry, with no way to focus the view, and fainter stars barely show up at all.
This makes it hard to point the telescope toward anything that’s not a bright, easy target. For example, in order to find Epsilon Lyrae, the famous “double double” star, I had to center the finder on Vega and then use the 20mm eyepiece for a low-powered view. In this case, the eyepiece effectively acted as the finder as Epsilon Lyrae was easily visible within the same field of view.
(Incidentally, the two brightest components were easily visible at 20x, but to split each star again requires a magnification of about 100x, which is beyond the capabilities of the eyepieces supplied without the use of a barlow.)
You’ll therefore want to replace the finder at the first opportunity with something more capable, such as the Telrad Finder Sight.
While you’re at it, consider buying a sturdier tripod as the tripod provided will shake too much as you adjust the focus. This isn’t necessarily a problem with terrestrial views, but astronomical targets often require precise focusing, and a shaky view can make this hard to achieve. The downside here is that a good tripod could cost more than the telescope!
All this being said, it’s easily able to split Albireo at a low magnification of just 20x and provides a nice view at 40x, with both stars appearing sharp and colorful. The Moon also looked sharp with an Orion 3.5mm Stratus Wide-Field Eyepiece; this produced a magnification of 113x, indicating that the telescope is more than capable of producing fine views at magnifications of over 100x.
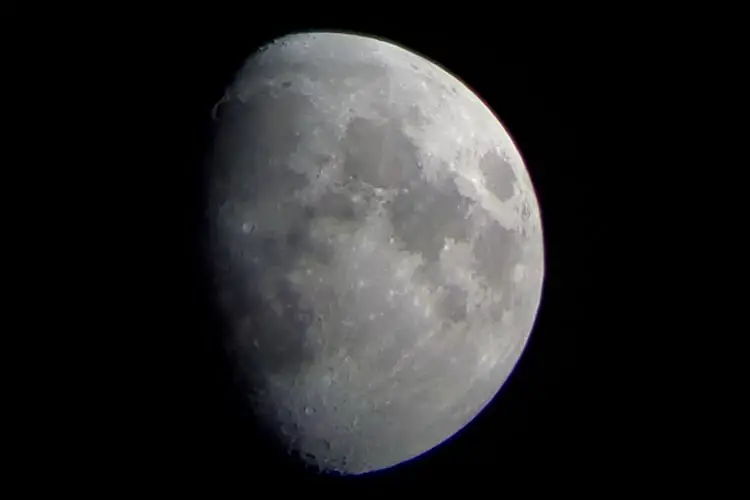
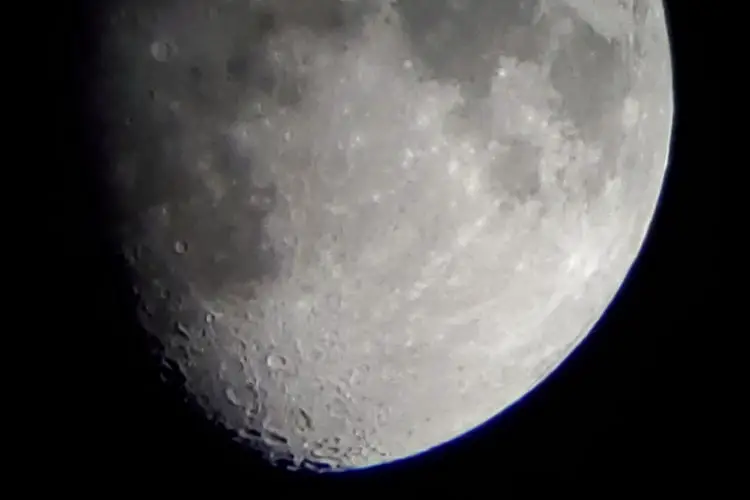
Taking images of the Moon with the smartphone adapter was very difficult, for two reasons. Firstly, it’s much harder to align the smartphone camera with the eyepiece in the dark. Secondly, you need to make sure the Moon is properly in the center of the eyepiece field of view; if it’s to the left or right of center, your smartphone camera will have difficulty getting it in shot.
After about ten or fifteen minutes of trying with the supplied adapter, the 20mm eyepiece, a Celestron Neutral Density Moon Filter and a Samsung Galaxy S10+, I admitted defeat. I swapped the eyepiece out for my own Orion Stratus Wide-Field eyepiece and took the images above by holding the smartphone up to the eyepiece. (I had to adjust the ISO and shutter speed to avoid over-exposing the image.)
Target Audience
The Celestron Travel Scope 80 has been designed to be the best of both worlds and caters to both outdoor enthusiasts and amateur astronomers alike. For the most part, it succeeds, as campers and hikers will find the backpack light enough to be taken almost anywhere, while children and adults alike can easily use the telescope for either astronomy or terrestrial viewing.
Even if you don’t travel much, this is still an ideal scope to use from the comfort of your backyard, whether you’re interested in what you can see in the skies above or on the land below.
Specifications
- Type: Refractor
- Mount Type: Alt-Azimuth
- Base: Tripod
- Computerized or Manual: Manual
- Aperture: 80mm (3.1”)
- Focal Length: 400mm (15.7”)
- Focal Ratio: f/5
- Included Eyepieces: 2
- Eyepiece 1: 20mm (20x)
- Eyepiece 2: 10mm (40x)
- Finderscope: 5×24
- Highest Useful Magnification: 189x
- Lowest Useful Magnification: 11x
- Limiting Stellar Magnitude: 12
- Resolution (Dawes): 1.5 arc-seconds
- Optical Tube: Aluminum
- Optical Tube Length: 457mm (18”)
- Optical Tube Weight: 2.4 pounds (1.1 kg)
- Tripod: Aluminum
- Tripod Height (incl. mount): 559mm to 1321mm (22” to 52”)
- Tripod Weight: 1.8 pounds (0.8 kg)
- Total Weight (Assembled): 4.2 pounds (1.9 kg)
- Total Weight (in Backpack): 5.3 pounds (2.4 kg)
- Warranty: Two Year Limited Warranty
What We Liked
- Very lightweight and portable
- Quickly and easily assembled
- Good optics for the price
- Generally very easy to use
- Good for kids
What We Didn’t Like
- Finder isn’t good for astronomy
- Backpack doesn’t adequately hold contents in place
- Smartphone adapter is difficult to use
- Tripod is a little shaky and easily tipped over
- Mounting plate easily drops off the central column
Final Verdict
The Travel Scope 80 is perfectly fine for the purpose it was designed for; a quality, lightweight and portable telescope that can be taken and used almost anywhere. It’s great for terrestrial views, but while the optics are more than up to astronomical tasks, the tripod and, in particular, the finder, leave something to be desired.
By upgrading the finder and keeping realistic expectations of the scope’s capabilities, there’s no reason why you couldn’t easily use the scope for both terrestrial and astronomical observing. It may not be capable of showing everything in stunning detail, but you can still reasonably expect to get a good view of potentially hundreds of night sky sights.
Recommended Accessories
- Celestron 1.25″ Moon Filter – pretty much an essential accessory, this filter reduces the glare of the Moon and allows you to observe it without being dazzled. It’s also “neutral density,” meaning that it produces a natural color view of the Moon.
- Celestron PowerTank Glow 5000 – a red flashlight is also essential if you’re using star charts and books as it will protect your night vision. The PowerTank has three brightness levels and a USB port to charge your smartphone or tablet.
- Celestron Omni 2x Barlow Lens – a 2x Barlow will double the magnification of any eyepiece you attach to it. It’ll provide magnifications of 40x and 80x if used with the Travel Scope 80 and the eyepieces supplied with it.
- Celestron 8mm to 24mm Zoom Eyepiece – avoid having to carry a range of eyepieces with you by using a zoom eyepiece. This eyepiece provides a magnification range of between 16x and 50x when used with the Travel Scope 80.
- Celestron Lens Cleaning Kit – dust can get everywhere and it’s important to keep the optics of your telescope and eyepieces clean. This kit has everything you need to ensure you get the best views possible.
If you’re looking for additional resources on stargazing, we have a number of articles that you might find interesting.
First off, we’ve created guides on a variety of astronomy related topics, such as our guide to determining the proper telescope cost, our guide to using a telescope for beginners, our astronomy guide for beginners, and our guide on the types of telescopes a beginner should buy. We’ve also created a series of helpful guides, such as our list of fun facts about astronomy (which any kids or beginners will no doubt find interesting), and our breakdown of kids stargazing guide.
We’ve also created a series of buying guides, including our overview of the best astronomy tools, our guide to evaluating the best telescopes for beginners, and our guide to the best binoculars for astronomy.
In addition to those guides, we’ve also created a series of in-depth reviews of a variety of telescopes and astronomy binoculars. You can check them out before you buy to find out the best accessories, pros and cons for different models, and even to see what they look like unboxed. If you’re considering buying a telescope we have a series of reviews that also serve as how to guides. You can get our series of guides to individual telescopes as well, including our review of the following telescopes and binoculars: Celestron SkyMaster DX 8x56mm review or our first-hand look at the Skymaster 15×70, Celestron Firstscope, SkyGenius 10×50 Binoculars, Opticron Adventurer II 10×50 Binoculars, Orion Astronomy 15×70 Binoculars, Orion XT6 Dobsonian Telescopes, Orion Scenix 7×50 Binoculars, Celestron ExploraScope 114AZ Telescopes, Zhumell Z100 Telescopes, Sky-Watcher Heritage 130 Telescopes, and the Celestron SkyMaster 20×80 Binoculars to really be able to dive into the different telescope and astronomy binocular models.
Born in England, Richard J. Bartlett has had a passion for astronomy since the age of six. Besides being featured in Sky & Telescope magazine and previously having his own monthly column in Astronomy magazine, he’s written and published a number of books (US Amazon and UK Amazon) including several for Orion Telescopes. Now residing in southern California, Richard never misses an opportunity to stare at the stars.