Most telescopes are designed for either astronomical or terrestrial use, with the latter having an additional lens to ensure the image appears upright. Unfortunately, the additional lens can deteriorate the image quality, which is why astronomical telescopes typically produce an inverted image. But what if there was a telescope that allowed you to do both – without sacrificing quality?
Our Score for the Celestron ExploraScope 114AZ Telescope
 Learn More |
Overall Expert Rating What we like: |
|---|---|
| Ease of Assembly | |
| Ease of Use | |
| Image Quality | |
| Accessories | |
| Value for Money |
All Photos Credit: Richard J. Bartlett
About the Celestron ExploraScope 114AZ Telescope
Packaging & Accessories
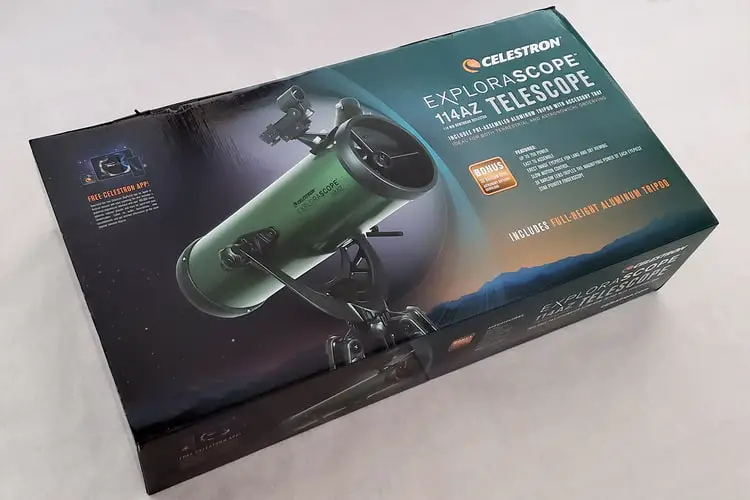
As with other products from Celestron, the telescope comes in attractive packaging that looks good and promises a product of equal quality. The box measures 35.0” x 18.5” x 8.5” (89.0cm x 47.0cm x 21.5cm) and weighs nearly 10 pounds, so while it’s not small, it can still be easily picked up and stored.
Inside you’ll find three tightly packed card boxes with the telescope and accessories in one box, the tripod in another, and curiously, nothing in the third.
In terms of accessories, you’ll find the following inside:
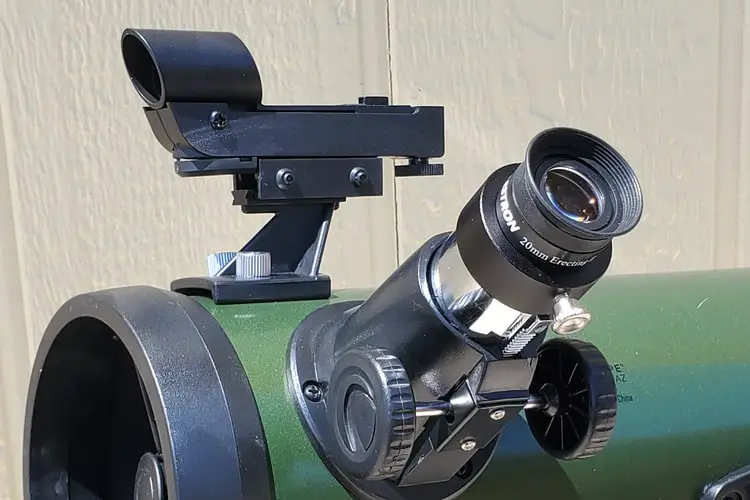
- 20mm eyepiece (50x)
- 4mm eyepiece (250x)
- 3x Barlow
- Red dot finder
- Accessory tray
- Instruction book
- A download code for a free copy of Starry Night Basic
The telescope has a focal length of 1000mm, giving the 20mm eyepiece a magnification of 50x (1000 / 20 = 50).1 Many regular telescopes will produce an inverted image, and while that’s also true of the ExploraScope, the included 20mm eyepiece will correct this, giving you a view that’s oriented correctly.
That’s not the case with the 4mm eyepiece, which will produce a regular inverted image at a magnification of 250x (1000 / 4 = 250) while the 3x Barlow will increase the magnification of any eyepiece attached to it by a factor of three.2
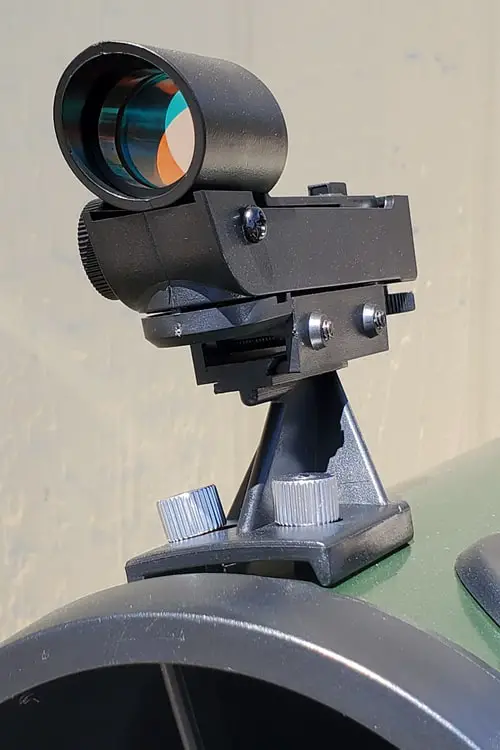
The finderscope is a standard “red dot” finder, so-called because when powered on, you’ll see a bright red dot projected onto the finder’s lens. This can be easier for beginners to use than a traditional finderscope with cross-hairs, as the dot is easily seen at night.

The accessory tray is circular, with holes cut into it to hold eyepieces, and it sits near the top of the tripod.
The instruction book is 40 pages long but contains directions in different languages, with the English portion covering the first 8 pages. After the directions themselves, there’s a page with some basic info on how to observe the Moon and the promise of more tips at explorethesky.com.
Unfortunately, that URL leads nowhere as the website appears to be missing. You’ll find the telescope specs are also missing from the instruction manual, and you’ll need to visit the product page on Celestron’s site for the details.
Quality & Durability
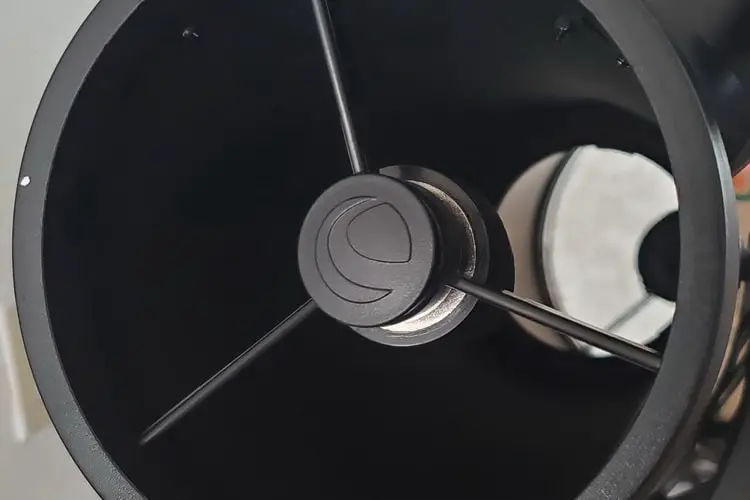
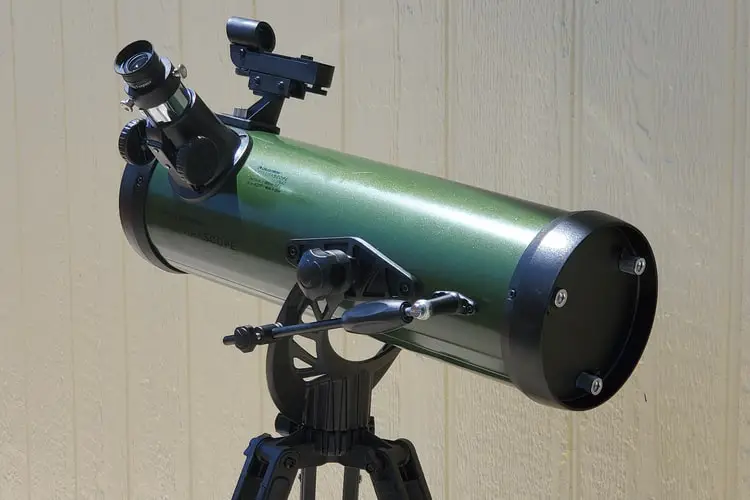
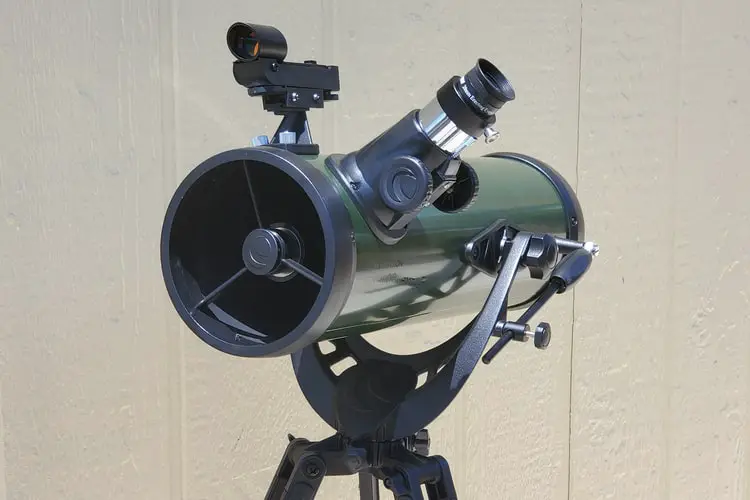
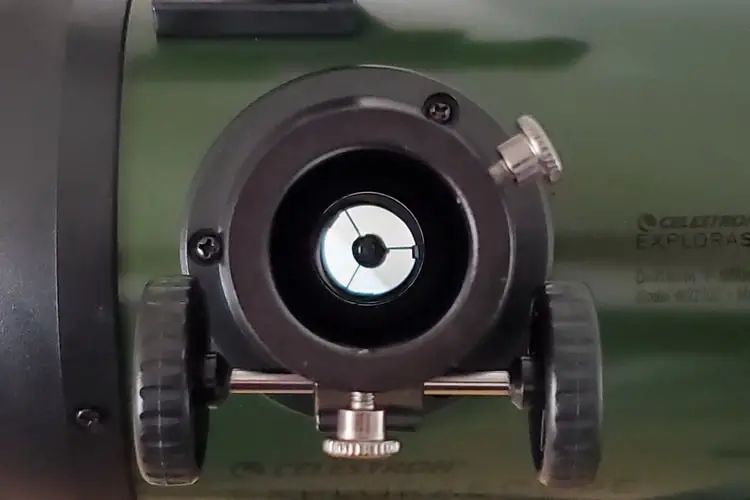
Let’s start with the optical tube, which, of course, is the primary component of the telescope itself. This is a reflector, so it uses a primary mirror at the bottom of the tube to reflect the incoming light back up the tube to a secondary mirror, which then reflects the light out through the eyepiece.
Being a reflector, the two mirrors will need to be re-aligned from time to time – a procedure called collimation. A quick visual check showed the mirrors to be very slightly out of alignment (which probably occurred during transit), but not so much to stop anyone from using the scope out of the box.
According to Celestron’s website, the optics are fully coated, and consequently aren’t as good quality as Celestron’s more expensive offerings that utilize their own StarBright XLT multi-layer coatings. (For example, their popular NexStar 8SE computerized telescope.)
Lastly, the optical tube is made of aluminum and can get hot quickly if the telescope is left outside in direct sunlight.
The tripod is also made of aluminum and despite being very lightweight, is sturdy enough for what it’s designed for. There’s a point at the end of each leg to provide a firmer grip in the ground and the legs are easily retracted, allowing users to quickly collapse the tripod and move the whole assembly to another location.
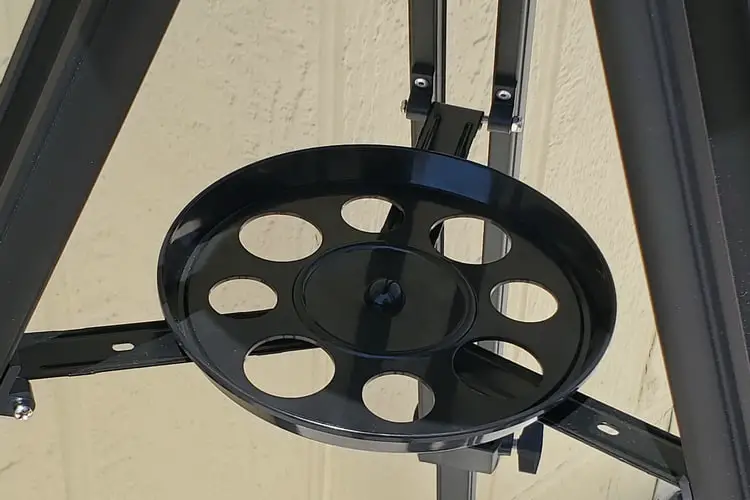
The circular accessory tray is attached near the top of the tripod and has eight holes of two different sizes. The larger holes can hold 1.25” eyepieces, but it’s not clear what the smaller holes are for; it’s not stated in the instruction manual and they’re too small to hold filters in place.
The center of the tray could be potentially used to loosely place filters, but the tray as a whole could have been better designed. For example, while the accessory tray can be rotated, it’s impossible to position it so that all four of the larger (or smaller) holes are unobstructed. So while there are four available spaces for 1.25” eyepieces, you’re only able to use three spaces at any one time.
The telescope comes with two eyepieces and a 3x Barlow, but none of these are of very good quality.
The 20mm (50x) eyepiece has a plastic barrel and the optics were out of alignment on the eyepiece I received. This was immediately apparent as part of the view was obscured in the top left. The field of view was also fairly small compared to similar eyepieces supplied with other telescopes. Lastly, it wasn’t threaded at the bottom, so you won’t be able to attach a filter.3
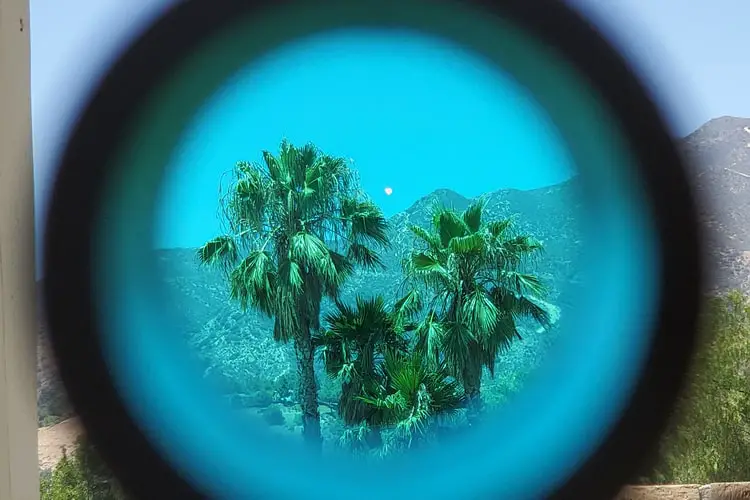
The 20mm eyepiece produces an erect image (i.e., one that is “right side up” as opposed to inverted, as a regular eyepiece would be) and is designed to be used for daytime, terrestrial observations.
The 4mm (250x) eyepiece tells a similar story. There’s no eyeguard, and the lens and field of view are very small. It’s difficult to understand the reason for adding this eyepiece at all; while a magnification of 250x might sound impressive (and it’s within the limits of the telescope), the eyepiece isn’t of sufficient quality to produce any views worth seeing.
Also, when coupled with the 3x Barlow, you get a magnification of 750x, which is far beyond the capabilities of the telescope.
The reality is that the ExploraScope doesn’t have the light-gathering capability to support that magnification. As a result, you won’t be able to focus the image and you’ll find yourself looking at a view that’s blurry at best.
As a general rule, I wouldn’t use a magnification more than about 1.5x the aperture, in millimeters, of the scope. In this case, the scope has an aperture of 114mm, which means I would limit my magnification to around 170x.
(The 4mm eyepiece is, at least, threaded to allow you to attach a filter.)
Like the eyepieces, the Barlow is also of inferior quality. It has a plastic tube, and like the 20mm eyepiece, it’s not threaded at the bottom for filters. The lens is located at the very end of the tube, making it easy to accidentally touch it with your fingers and get it dirty!
Assembling the Scope
According to Celestron’s website, the ExploraScope 114AZ has a “quick and easy, no-tool setup,” a claim that’s sure to be met with some skepticism by anyone who’s ever assembled flat-pack furniture.
Fortunately, in this instance, Celestron’s claims are pretty much on-point. The instruction booklet has directions in five different languages – English, French, German, Spanish and Italian – so there’s little to no danger of there being a language barrier.
The instructions cover the three ExploraScope refractors and the ExploraScope 114AZ, the only reflector. That said, there shouldn’t be much confusion as the instructions either apply to both the refractors and reflectors, or there’s a differentiation made between them.
For example, there’s an image of the assembled refractor and the assembled reflector in the Parts List. The only relatively minor critique here is that it would have been useful to have a complete list of the parts in the box (especially since the parts are almost identical for both refractors and reflectors) rather than just the images.
For example, there are two telescope mounting bolts that aren’t shown or listed anywhere (although they’re mentioned at the relevant point in the directions) so if they’re missing, you won’t know this until it comes time to attach them.
The instructions themselves are pretty clear, and the scope is easy enough to assemble. In fact, if you’ve got some experience assembling scopes, you may not need the instructions at all.
There are, however, a couple of things I would change if I had the chance.
Firstly, it might be a good idea to have a note (or maybe even a warning) to be careful when attaching the telescope’s optical tube to the mount. If you’re assembling it by yourself, you’ll need to hold the tube in place while simultaneously attaching and tightening the screws and bolts.
Secondly, the instructions for attaching and aligning the finder could use some clarification. More specifically, there needs to be clearer instructions and/or an image showing which way the finder should be attached.
Once attached, the instructions say to move the scope left, right, up, and down, but it isn’t actually stated how to do this. If you’re inexperienced with scopes this might cause some confusion as you try to determine exactly how to accomplish this.
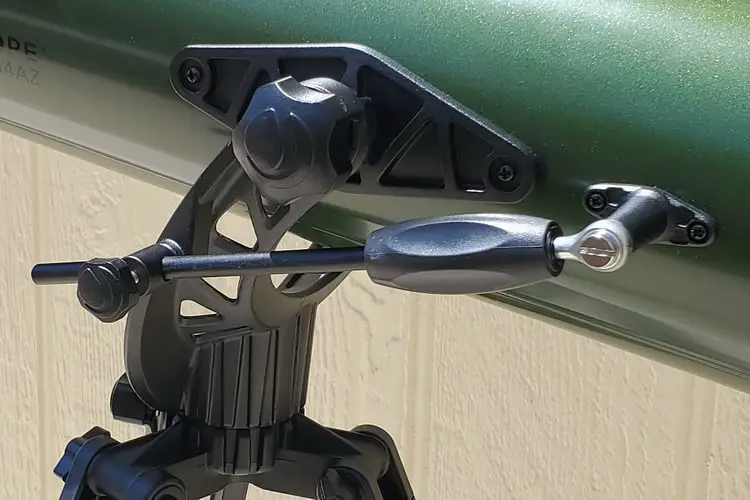
(You’ll need to loosen the bolt on the slow-motion rod to move the scope vertically, and loosen the bolt at the bottom of the mount to move the scope horizontally. It would definitely be beneficial if there was an image showing where the applicable knobs are located.)
The finder itself is easy enough to set up, unlike the Travel Scope 80, and once aligned you won’t need to adjust it too much again. Remember to power off the finder when you’re finished; otherwise, the battery could drain before you go to use the scope again. Incidentally, there are no instructions on how to change the battery in the finder either. (You can read Celestron’s blog post on how to do this here.)
Ease of Use
Being an alt-azimuth tripod mount, the ExploraScope 114AZ is simple enough to use.4 The optical tube moves smoothly in a horizontal and vertical motion, making it easy to point it toward your intended target.
This is just as well since there are no directions in the manual on how to move the scope. The assembly instructions are adequate, but anyone new to using a telescope might be confused about what to do next. In all, there are five knobs that could conceivably lock, unlock or adjust the movement of the scope, none of which are labeled in the depiction of the fully assembled scope in the instructions.
Given that two of those knobs will cause the optical tube to fall out of its mount if you loosen those by mistake, this seems like a major oversight.
The scope’s horizontal movement is locked and unlocked by a single knob at the top of the tripod, just below the mount. Similarly, the scope’s vertical movement can be locked and unlocked by turning the knob found on the side of the slow-motion rod guide.
There’s also no explanation of what the slow-motion rod does. Experienced users will probably know that you can slowly move the scope vertically by turning the knob at the end of the rod, but newbies are left to figure this out for themselves.
This is unfortunate, as the rod is very useful for moving the target to the center of the field of view (especially after switching to a higher power eyepiece) and for making fine adjustments to counter the movement of your target as it rises and sets in the sky.
One good thing about the ExploraScope 114AZ is that it’s easily transported from one location to another. Even if you don’t remove the tripod, you can quickly remove the accessory tray, retract and fold the tripod legs and then carry it to wherever you need it to be. Even fully assembled, its total weight is only 6.7 pounds (1.1 kg), making this a great, lightweight option.
In fact, once you’ve loosened the legs, it’s possible to lift and move the entire assembly with a single hand!
Performance
In terms of the finderscope, many of the more experienced amateur astronomers don’t like red dot finders. For starters, the finder’s lens is tinted, which makes it hard to see the fainter stars, which, in turn, makes it hard to locate many of the objects you’ll want to observe. After all, not every object can be found close to a bright star.
It’s also sometimes hard to center it on a fainter target as the red light itself will hide the target from view. That said, the finder supplied is adequate for brighter targets and should be relatively easy for anyone to use – regardless of their experience level.
Manual scopes, such as this, will often have some play when you center the target and lock the scope in place, causing the target to move away from the center of the field of view. While this is hard to avoid, the ExploraScope 114AZ has very little movement. In fact, you may not even need to lock it at all, as the tube is held quite firmly in place, even without the lock.
Similarly, the focus mechanism is very smooth, with minimal shake, allowing you to fine-tune the focus of the image without the frustration of trying to do so while the image is shaking.
So far, so good, but as noted earlier, the supplied eyepieces and Barlow lens aren’t great quality. For example, since the 20mm was misaligned, and the stars appeared distorted when out of focus, instead of appearing as large circles, as they should.
You’ll also find that the 20mm is meant to be an erect image eyepiece – in other words, the image should appear “right side up” as opposed to the inverted image of regular eyepieces. This makes it a great option for observing terrestrial objects, but you’ll need to make a slight adjustment.
If you’re standing perpendicular to the optical tube and looking through the eyepiece, you’ll see the image is at a 45-degree angle. For example, terrestrial objects, such as houses and antennae, look as though they’re sinking with the Titanic. You’ll need to adjust the angle of your body in relation to the optical tube so that the view appears correctly.
That said, this isn’t really an issue for astronomy since the angle of the celestial object being observed isn’t important. Just be aware that the 4mm eyepiece produces an inverted image, and as a result, swapping from the 20mm to the 4mm means the angle of your image will change, which could be disorienting.
The 4mm eyepiece itself has an unusually short focal length. Many telescopes will come with a long focal length eyepiece (around 20mm) that produces a low magnification, and often a second, shorter focal length eyepiece (around 10mm) that produces a medium to high magnification.
The shorter the focal length of the eyepiece, the smaller the lens and the smaller the field of view, which can be uncomfortable for your eyes. Consequently, the 4mm eyepiece has a very small lens with a small field of view, making it difficult to center your target. And with a magnification of 250x, it’s also hard to focus, as the shaking of the image is magnified too.
The truth is, both the supplied eyepieces are non-starters for astronomical work. With the 20mm producing a magnification of 50x, it’s actually a little too high for a beginner to easily use, whereas more experienced observers will want a better eyepiece with a wider field of view. The 4mm is also problematic for the same reasons.
The included Barlow lens will increase the magnification of any attached eyepiece by a factor of three. Again, it’s not great quality; it appears to be completely made of plastic and is useless with the 4mm eyepiece. The scope has a maximum useful magnification of 269x; the 4mm by itself produces a magnification of 250x, and attaching it to the 3x Barlow produces a magnification of 750x – far beyond the capabilities of the scope.
Realistically then, you have one magnification (50x) available to you if you want to use the telescope for terrestrial observing, and three magnifications (50x, 150x, and 250x) if you want to use the telescope for astronomy.
All this being said, the scope does a capable job of producing some decent views with the supplied eyepieces.
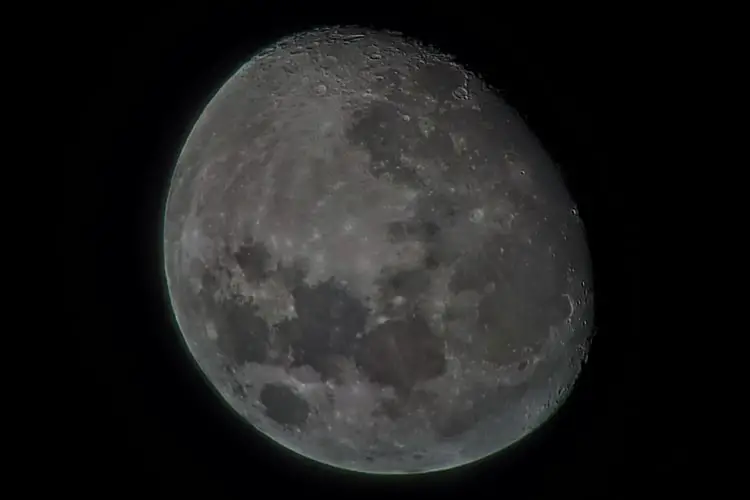
For example, the Moon was very clear and sharp – almost surprisingly so. There was no chromatic aberration around its limb with the 20mm eyepiece, and only a little was visible with the 4mm. The photo above was taken with a Samsung Galaxy S10+ phone held up to the eyepiece.
(Incidentally, it’s recommended that you invest in a neutral density lunar filter if you want to observe the Moon. This will help to cut out the majority of the Moon’s light and will keep your eyes from being dazzled, but you’ll need to buy a new 20mm eyepiece to use it.)
Venus showed a discernable gibbous disk with both eyepieces, but there was a lot of shimmering and aberration due to the planet’s relatively low altitude at the time of observation.
Albireo, a famous double star of gold and sapphire components, was easily split with the 20mm eyepiece, as was Cor Caroli in Canes Venatici. The two primary stars of Epilson Lyrae (the “double double”) could be easily seen with the 20mm, but weren’t split again with the 4mm. This was surprising, since the eyepiece’s magnification of 250x should have been more than adequate.
I was, however, impressed that I could find the Ring Nebula with the 20mm eyepiece, especially since the misalignment of the optics in the eyepiece was something of a handicap.
Lastly, IC 4665, a large open star cluster in the constellation Ophiuchus, was relatively easily found with the 20mm eyepiece. However, besides the brightest stars, there weren’t that many fainter stars to be seen.
Target Audience

Celestron has clearly designed and marketed the ExploraScope 114AZ as a telescope to be used during both the day and night, and for the most part, it succeeds. It’s a good choice for anyone wanting to get a closer look at terrestrial objects but more experienced observers will most likely want to invest in something that has better optics.
The optics on this scope are adequate and will work for anyone new to the hobby or who’ll be observing brighter targets (or maybe those living under light-polluted skies) but the scope isn’t up to the task of studying most faint fuzzies, such as galaxies and planetary nebulae.
Specifications
- Type: Newtonian Reflector
- Mount Type: Alt-Azimuth
- Base: Tripod
- Computerized or Manual: Manual
- Aperture: 114mm (4.5”)
- Focal Length: 1000mm (39.4”)
- Focal Ratio: f/9
- Included Eyepieces: 2
- Eyepiece 1: 20mm (50x)
- Eyepiece 2: 4mm (250x)
- Finderscope: StarPointer red dot finderscope
- Highest Useful Magnification: 269x
- Lowest Useful Magnification: 16x
- Limiting Stellar Magnitude: 12.8
- Resolution (Dawes): 1.0 arc-seconds
- Optical Coatings: Fully coated
- Optical Tube Length: 610mm (24”)
- Tripod: Aluminum
- Tripod Height (incl. mount): 559mm1321mm (52”)
- Total Weight (Assembled): 6.7 pounds (3.0 kg)
- Warranty: Two Year Limited Warranty
What We Liked
- Good aperture for the money
- Easy to assemble
- Smooth focus with relatively little shake
- Easily moved from one location to another
- Can be used for both terrestrial and astronomical observations
What We Didn’t Like
- Low quality eyepieces and barlow
- Lack of directions on how to use the scope
- The “erect image” eyepiece produced an image at an angle
- Oddly designed accessory tray
Final Verdict
For the most part, if you’re looking for a scope that can be used both during the day for terrestrial observations and at night for astronomy, then the ExploraScope 114AZ should fit the bill. It adequately serves its purpose and is a good starter scope for a beginner, especially if it’s an older child just getting into the hobby. Younger kids with adult supervision could also benefit from it.
If you want to use this scope for stargazing, you’ll need to buy some better eyepieces, as the 20mm and 4mm provided simply aren’t up to the task. Likewise, you’ll want to upgrade the Barlow lens and consider replacing the finder too (for example, with a Telrad Finder Sight). Once you do, you’ll find the views to be inspiring and the scope to be worth the money.
Recommended Accessories
- Celestron 1.25″ Moon Filter – pretty much an essential accessory, this filter reduces the glare of the Moon and allows you to observe it without being dazzled. It’s also “neutral density,” meaning that it produces a natural color view of the Moon.
- Celestron PowerTank Glow 5000 – a red flashlight is also essential if you’re using star charts and books as it will protect your night vision. The PowerTank has three brightness levels and a USB port to charge your smartphone or tablet.
- Celestron Omni 2x Barlow Lens – a 2x Barlow will double the magnification of any eyepiece you attach to it. It’ll provide magnifications of 100x and 500x if used with the ExploraScope 114AZ and the eyepieces supplied with it.
- Celestron 8mm to 24mm Zoom Eyepiece – avoid having to carry a range of eyepieces with you by using a zoom eyepiece. This eyepiece provides a magnification range of between 42x and 125x when used with the ExploraScope 114AZ.
- Celestron Lens Cleaning Kit – dust can get everywhere and it’s important to keep the optics of your telescope and eyepieces clean. This kit has everything you need to ensure you get the best views possible.
If you’re looking for additional resources on stargazing, we have a number of articles that you might find interesting.
First off, we’ve created guides on a variety of stargazing areas such as our guide to find the best low cost telescopes, our walk through of how to use a refractor telescope, our astronomy guide for beginners and our guide on determining the best type of telescope to buy for your first telescope. We’ve also created a series of helpful guides, such as our list of interesting facts about astronomy (which any kids or beginners will no doubt find interesting), and our breakdown of astronomy vocabulary for kids.
We’ve also created a series of buying guides, including our overview of the tools astronomers use, our guide to finding the best telescope for viewing planets and galaxies for beginners, and the best astronomy binoculars for beginners.
In addition to those guides, we’ve also created a series of in-depth reviews of a variety of telescopes and astronomy binoculars. You can check them out before you buy to find out the best accessories, pros and cons for different models, and even to see what they look like unboxed. If you’re considering buying a telescope we have a series of reviews that also serve as how to guides. You can get our series of looks at astronomy tools, including our: Celestron SkyMaster DX 8x56mm hands-on binocular review or our look at the Skymaster 15×70, Celestron Firstscope telescope reviews, Orion XT6 Dobsonian Telescope reviews, Zhumell Z100 Telescope Review, Sky-Watcher Heritage 130 Telescope reviews, SkyGenius 10×50 Binocular reviews, Orion Scenix 7×50 Binocular reviews, Orion Astronomy 15×70 Binocular reviews, Opticron Adventurer II 10×50 Binocular reviews, Celestron Travel Scope 80 Telescope reviews, and the Celestron SkyMaster 20×80 Binocular reviews to really be able to dive into the different telescope and astronomy binocular models.
Article Sources
Moon and Back uses only high-quality sources, including peer-reviewed studies, to support the facts within our articles. Read our editorial process to learn more about how we fact-check and keep our content accurate, reliable, and trustworthy.
- Hawks C. Simple Formulas for the Telescope Owner skyandtelescope.org. Published November 20, 2017. Accessed August 2, 2021.
- Richards S. What is a Barlow lens? skyatnightmagazine.com. Published March 27, 2020. Accessed August 2, 2021.
- Vamplew A. Telescope Filters: A Beginner’s Guide skyatnightmagazine.com. Published September 8, 2020. Accessed August 2, 2021.
- Should I Use an ALT-AZ or Equatorial Mount? celestron.com. Published July 2, 2018. Accessed August 2, 2021.
Born in England, Richard J. Bartlett has had a passion for astronomy since the age of six. Besides being featured in Sky & Telescope magazine and previously having his own monthly column in Astronomy magazine, he’s written and published a number of books (US Amazon and UK Amazon) including several for Orion Telescopes. Now residing in southern California, Richard never misses an opportunity to stare at the stars.