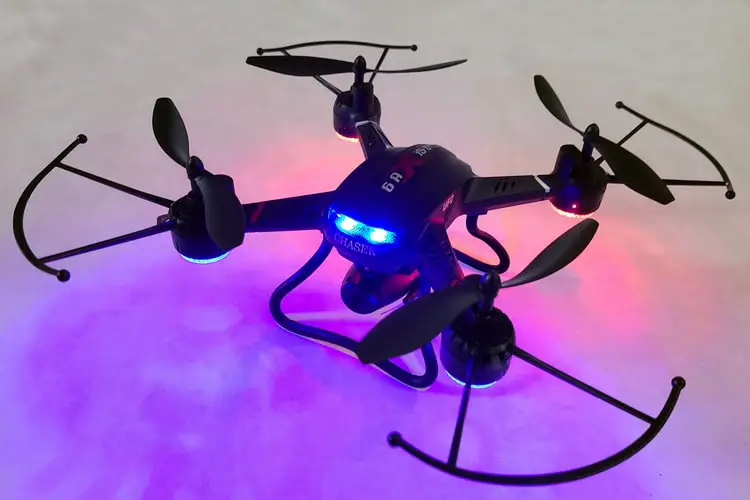
Holy Stone produces a variety of drones designed for various ages and experience levels, from beginner to expert. But choosing the right Holy Stone drone for yourself or your child can be difficult. What features should you look for? Is a particular model well-suited for your needs and experience level? We tested the Holy Stone F181W Drone (which you can buy here) to see how it stacks up.
Our Score for the Holy Stone F181W Drone
 Learn More |
Overall Expert Rating What we like: |
|---|---|
| Getting Started | |
| Batteries | |
| Features | |
| Ease of Use | |
| Value for Money |
All Photos Credit: Richard J. Bartlett
About the Holy Stone F181W Drone
Packaging & Accessories
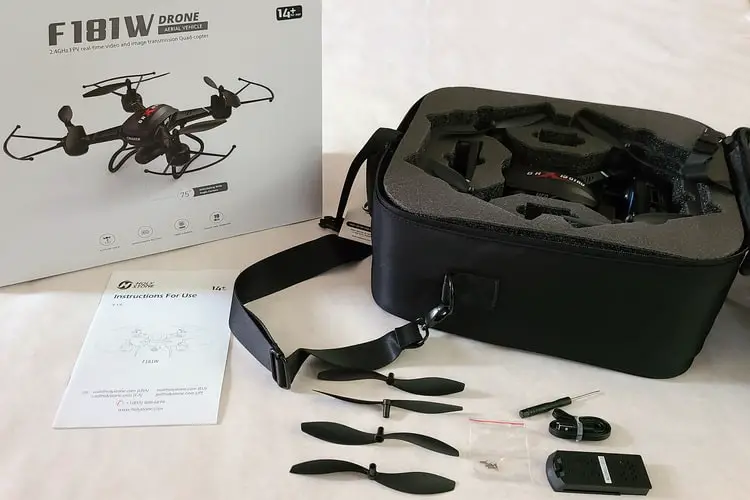
The packaging for the F181W is familiar territory for anyone used to Holy Stone’s drones: it comes in a large, predominantly white box with a minimalistic design that conveys only the most basic information. Measuring 15 x 12 x 6.5 inches (38 x 30 x 17 cm) and weighing 3.2 pounds (1.5 kg), the box has a plastic carry handle at the top, but should you need to transport the drone, there’s a carry case included which can be found inside.
In all, each of the following is supplied with the drone:
- 1 x Drone
- 1 x Controller
- 2 x Drone batteries
- 1 x USB charger cable
- 2 x Landing gears
- 4 x Propeller guards
- 4 x Replacement propeller blades
- 4 x Replacement propeller screws
- 1 x Cell phone holder
- 1 x Mini screwdriver
- 1 x Carry case
- Instruction booklet
Everything is packed securely inside the provided case with a molded foam insert tightly keeping everything in place.
Assembly and Getting Started
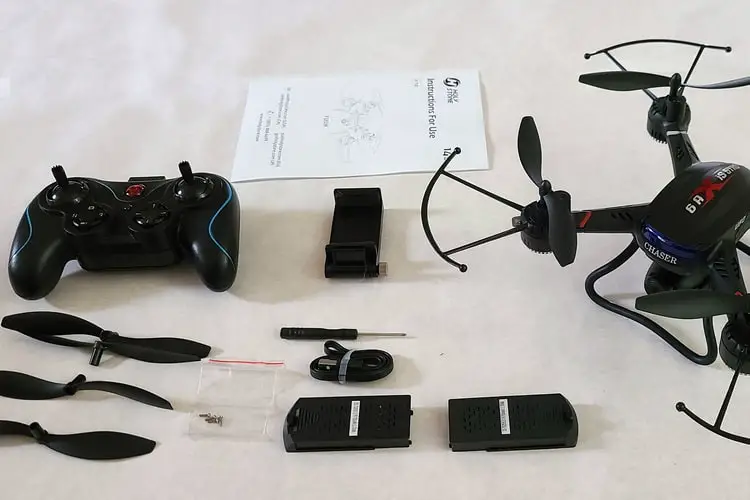
As with its big brother, the Holy Stone HS120D drones, the F181W requires very little assembly out of the box as the drone comes with its propellers attached and one of the batteries is already inserted. You may need to charge one or both drone batteries before use, but both batteries arrived with at least enough juice to take the drone out for a test flight.
You will, however, need to find four AA batteries for the controller; otherwise, you won’t be going anywhere!
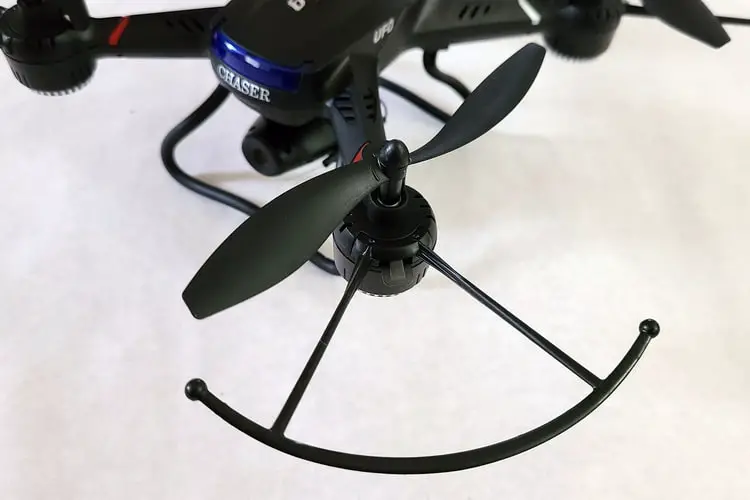
Beyond the batteries, you only have to insert the two landing gears and the four propeller guards. Unlike a lot of other drones, these clip into place quite securely and are not easily detached. For example, the landing gears actually slide into place, rather than having pegs or pins that loosely fit into holes on the underside of the drone.
The downside is that both the landing gears and the propeller guards can be slightly fiddly to remove; in both cases, you’ll need to push down a tab while pulling the part out. This wasn’t a problem with the landing gear, but the propeller guards needed a fair amount of force to remove them.
Once the batteries are inserted and the gears and guards are attached, you only need to pair and calibrate the drone.
Pairing is easy. There’s a power switch on the bottom of the drone and the controller is powered on with the red button between the joysticks. With both units on, you only need to move the left joystick up and down in order for the drone and controller to pair. The lights on the drone will stop flashing once this happens.
To calibrate the drone’s gyro, you only need to simultaneously push both joysticks down to the lower left. Again, once the drone lights turn solid, the gyros are calibrated. It’s a good idea to calibrate the gyros every time before you fly, but the good news is that it only takes a second and then you’re ready to go.
If you’d like to fly the drone via your cell phone, utilize some of the more advanced features or use your phone to store images and video, you’ll need to install Holy Stone’s app. Confusingly, it’s called Deerc FPV, but otherwise, it functions in the same way as their other apps.
Once installed, you’ll need to connect to the drone’s Wi-Fi network; not only is this necessary to control the drone but also to view and record real-time video from the drone’s camera on your phone.
Quality and Durability
The carry case, like the one provided with the HS120D, is black and should be durable enough for it to protect its contents from almost any accident. There’s a shoulder strap, carry handle, and a handy pocket on both the outside and inside of the case. Molded foam keeps everything safe, with a strap and clip that will help to prevent anything falling out.
Both the controller and the drone are very lightweight; inserting the batteries into the controller doubles its weight while the drone itself only weighs 4.9 ounces, or just a little less than a third of a pound. The controller, more than the drone, feels somewhat flimsy and easily breakable, so it’s probably advisable to avoid dropping it on any hard surface.
The drone seems sturdier and the landing gears and propeller guards will provide some protection, As mentioned earlier, both the propeller guards and landing guards are pretty securely attached to the drone and (as long as they’re properly installed) shouldn’t fall off if the drone hits a solid obstacle.
Similarly, there’s little to no danger of the battery falling out either as it’ll snap firmly into place at the back of the drone.
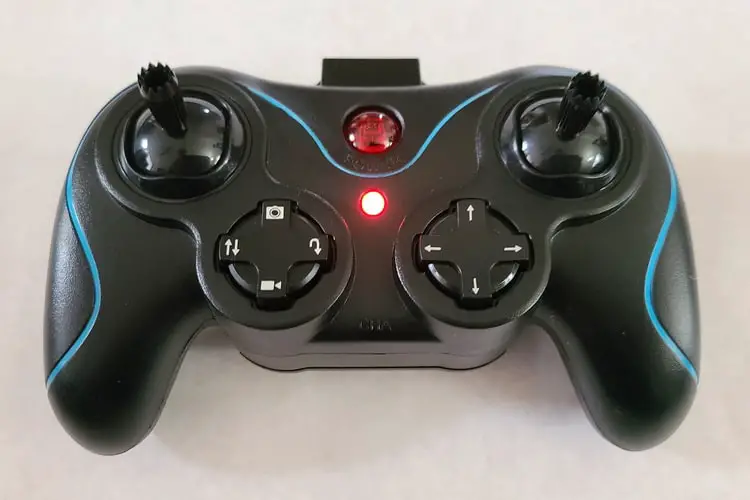
On the default settings, the controller’s left joystick alters the drone’s height and allows it to turn left or right. The right joystick will move the drone backward and forward and from side to side. Below the left joystick are four buttons.
Clockwise, from the top, the buttons’ functions are:
- Take a photo
- Headless mode
- Capture video
- One key start/landing
There are also four buttons below the right joystick that are used to trim the drone’s drift. Having the trim controls here is a little unusual, as trim is often adjusted by pushing a button and then moving the right joystick in the required direction.
The left button at the front of the controller alters the speed (there are three available) while the right button will cause the drone to perform 360-degree flips.
Performance and Ease of Use
In principle, flying the drone shouldn’t be too hard as the controller has a fairly standard layout and is able to perform the basic functions. However, the problem lies in actually controlling the drone in flight.
After calibrating the drone’s gyro, you can start the rotors by either pushing the one key start/landing button. Take-off is then achieved by gently moving the left joystick upwards. Unfortunately, the drone will most likely immediately start to drift, especially if there’s a slight breeze. This is probably due to its lack of weight, causing you to immediately attempt to trim the drift, but this will most likely produce some mixed results.
Beyond that, the drone flew reasonably well and the camera did a good job of taking photos and recording video.
Features & Functions
The functions listed below can be performed through either the controller or the app (although you’ll probably find it easier to fly the drone with your controller rather than your cell phone).
- Pairing and Calibration: There was no problem at all with either the pairing or gyro calibration, with both tasks being completed in just a couple of seconds.
- One Key Take-Off and Landing: Although the rotors of the F181W can be started with the push of a button, it doesn’t have a one-key take-off function and you’ll need to launch the drone yourself by gently moving the left joystick. The one-key landing worked reasonably well, although the drone seemed to land fairly heavily.
- Emergency Stop: This will cause the rotors on the drone to immediately stop, regardless of the drone’s height, with the drone dropping out of the sky as a result. The function does its job, but it’s best to only use this as a last resort as you’ll risk damaging the drone.
- Trim: As noted earlier, the drone has a tendency to drift, even when there’s little to no breeze. Trimming will help to adjust the drift, but you might find yourself repeatedly pushing the trim buttons before the drone can be stabilized.
- Headless Mode: Experienced operators will know that this allows you to fly the drone in a simple left/right, backward/forward motion, which makes it easier for beginners to control the drone. Unfortunately, the drift of the drone made it a little hard to control.
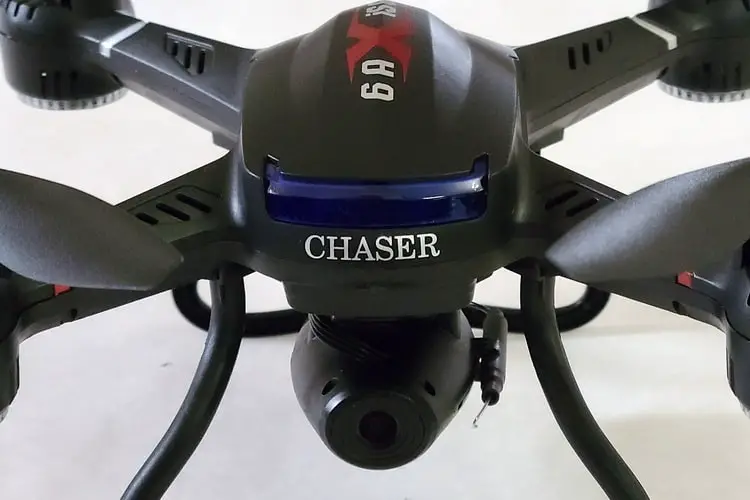
- Photos and Videos: The camera performed reasonably well, with one nice touch being the ability to adjust its angle. This, in turn, allows you to aim the camera more towards the ground, rather than directly ahead. Photos and video are recorded in MP4 format with dimensions of 1920×1080 pixels when recorded on an onboard micro SD card and 1280 x 720 pixels when recorded directly by your cell phone. There’s something of a fish-eye effect on both the photos and video, and while the photos came out well, the video could be a little jerky in places.
- Altitude Hold / Hover: Once the drift had been corrected, this worked well, with the drone being able to maintain its height. It’s worth noting that this function won’t work if the battery is low.
- Flips: Once you have enough altitude (typically around 10 feet) you can have the drone perform flips in any direction.
- Return to Home: There’s no auto return to home as the drone is not equipped with GPS; however, when Headless Mode is activated, the drone will automatically start to fly toward the operator.
The following features and functions can be performed exclusively through the app and are better suited to advanced users:
- Gesture Mode: This allows the operator to control the drone using a preset range of hand gestures.
- Voice Commands: You can tell the drone to take off, land, move in various directions and capture photos and video by using the microphone on your phone to issue voice commands.
- VR Mode: If you have a VR headset, you can enjoy live video from the drone as it flies above you.
Target Audience
While it seems as though Holy Stone has aimed this at the beginner, it’s probably best suited to someone with a little more experience. The biggest issue is with the drift, as beginners may find it difficult to control the drone when it’s so lightweight and easily blown by even the slightest breeze. Similarly, even older children might need a little supervision to prevent having the drone blown somewhere it shouldn’t be.
Specifications & Features
Specifications:
- Weight: 0.4 pounds
- Flight time per battery: 10 mins
- Number of batteries supplied: 2
- Battery charge time: 60-90 minutes each
- Total flight time, out of the box: 20 mins
- Maximum range: 328 feet (100 meters)
Features:
- Headless mode: Yes
- Manual return: Yes
- Smartphone FPV: Yes
- Auto Return: No
- One key takeoff/land: Yes
- Altitude hold: Yes
- Point of interest/custom mode: No
- Obstacle avoidance: No
- Stunts: Yes
- Colored LED Lights: Yes
- GPS Enabled: No
- Follow Me mode: No
What We Liked
- Quick and easy to get started
- Good battery life
- Propeller guards and landing gears don’t drop off
- Handy carry case
What We Didn’t Like
- A lot of drift
- Video was a little jerky
Final Verdict
It’s very easy to get started with the F181W and the battery provides some decent flying time. The camera produces some decent images and video, and having propeller guards and landing gears that are firmly attached and won’t drop is another plus. Again, the drift could be a problem for beginners, which is a shame as otherwise it seems to be a very capable drone.
If you’re looking for more information about drones, we’ve created a series of guides to the different drones available. You can check out our overviews of the best best drone for kids and the best best drone under $200.
Additionally, we have a series of in-depth product reviews of specific drones, including our contribution to: Holy Stone HS165 foldable drone reviews, Potensic d80 drone reviews, Tomzon a31 flying pig mini drone reviews, Snaptain s5c drone reviews, Holy Stone hs340 mini drone reviews, Holy Stone hs210 mini drone reviews, Holy Stone hs110d drone reviews, Holy Stone hs120d drone reviews, Eachine e520 foldable drone reviews, and our DEERC UFO mini drone reviews. Each of these guides will walk you through the different features, instructions, pricing, and pros and cons for each drone to help you find the best one for you.
