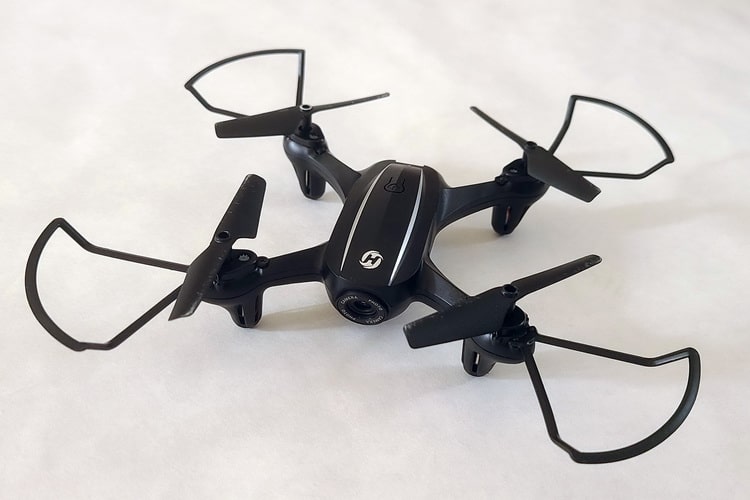
There are hundreds of drones on the market, with prices ranging from anywhere between about $30 and $5,000. If you’re new to flying drones or you want something the whole family can enjoy, it’s hard to find one that’s fully featured, easy to fly and cost-effective. Fortunately, Holy Stone has a solid reputation for producing drones that are inexpensive and that can be flown by almost anyone – have they struck the right balance with the HS340 (which you can buy here)?
Our Score for the Holy Stone HS340 Mini-Drone
 Learn More |
Overall Expert Rating What we like: |
|---|---|
| Getting Started | |
| Batteries | |
| Features | |
| Ease of Use | |
| Value for Money |
All Photos Credit: Richard J. Bartlett
About the Holy Stone HS340 Mini-Drone
Packaging & Accessories
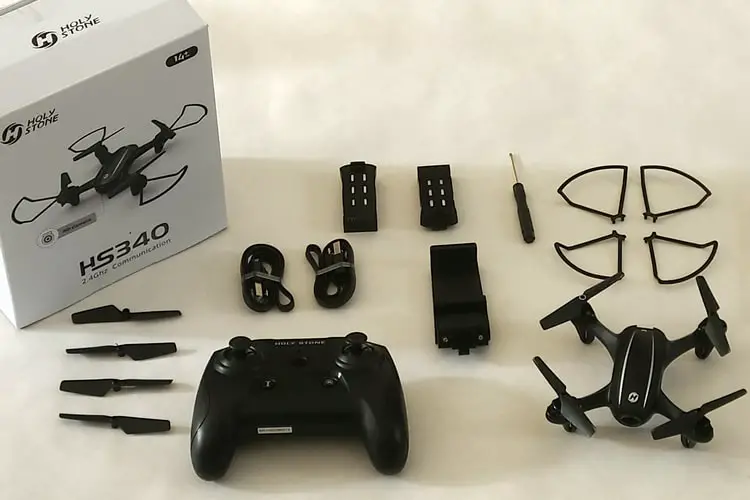
Holy Stone tends to package their drones in stylish, fairly minimalistic packaging, usually with a black on white design that complements the black drone within. The box measures 3.5 x 6.0 x 6.8 inches, weighs just 14 ounces and is sturdy enough to protect the contents.
The interior packaging is clear plastic and consists of two parts; the drone itself is in the top half, while the bottom half holds the controller. The plastic is somewhat flimsy, but that’s not necessarily an issue if you don’t intend to keep it.
However, if you intend to keep the packaging to store the drone, it’s worth knowing that packing the drone away might be a little problematic, as the clear plastic packaging will bulge unless you put everything back the way it was when you first opened it. The bulging plastic can then make it difficult to slide the packaging back into the box, and you may have to force it in as a result.
Inside the box you’ll find:
- 1 x Drone
- 1 x Controller
- 2 x Drone batteries
- 2 x USB charging cable (Micro USB-B)
- 4 x Spare propellers
- 4 x Propeller guards
- 1 x Controller dust cover
- 1 x Cell phone holder
- 1 x Mini crosshead screwdriver
- Instructions, warranty card and battery info
There’s no charger for the batteries, only the cables, so you’ll need to either plug the batteries into a cell phone charger, a computer or a power strip that has USB outlets.
Assembly and Getting Started
One of the first things you’ll notice is that the instruction booklet is thick – 87 pages, in total. There are three languages here, with the English portion taking up the first 30 pages. As you might expect, it seems as though the directions themselves have been translated into English; there are a number of errors, but these shouldn’t affect your understanding of the instructions.
For example:
“Please flight the drone back to you”
“Avoid short circuits by fitting the batteries incorrectly.”
You might also notice that the booklet says there is one drone battery included (when in fact there were two) and that you’ll need to install the propellers, but these were already attached. That said, the directions will come in handy if you ever need to replace them.
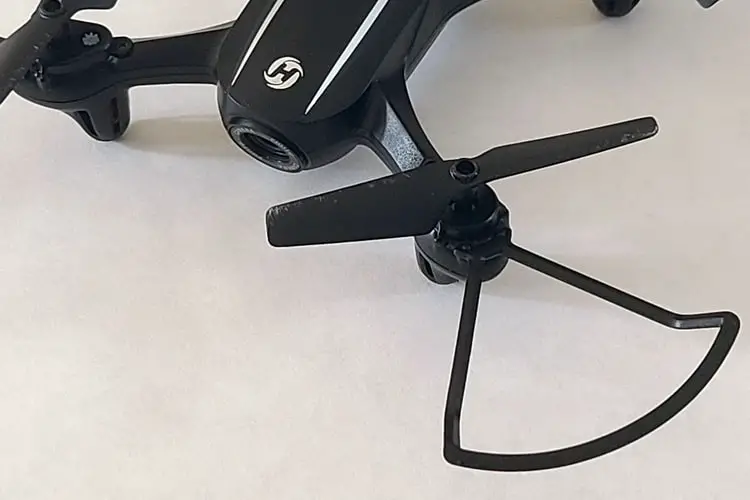
The propeller guards were easy to install as they only needed to be pushed down, and after you’ve slotted in the drone battery and found three AAA batteries for the controller, you’re almost ready to go.
At this point, you can start flying the drone, but if you want to take photos and record video, you’ll need to install the HS PPV app. There are QR codes in the instruction booklet that will take you to the Apple or Google Play app stores where you can download and install the app for free.
The included cell phone adapter clips to the controller and allows you to view live video from the drone as you fly it, but it didn’t quite function as desired. The adapter slots into the controller between the two buttons at the front, but you’ll need to remove the dust cover first. Unfortunately, this is easier said than done, as it’s hard to grip and pull the cover out.
Inserting the cell phone holder wasn’t a problem as it can be easily slotted into the controller itself. It extends to about three and a half inches, which should be plenty for almost any phone, and it’s deep enough to accommodate the cell phone case too. There are also grips to ensure your phone doesn’t slip out.
If you want to use your phone to take pictures or shoot video, you’ll need to also connect your cell phone to the drone via a Wi-Fi signal. When the drone is powered on, it will start to broadcast its own network, named HolyStoneFPV-****** (where ****** is replaced with six characters of numbers and letters.)
Connecting to the drone’s network was easy enough, but you’ll need to press the triangular Play button on the app in order to see the view from the camera. (It should also be noted that while you’re connected to the drone network, you won’t have any internet access via Wi-Fi, as you can only be connected to one network at any given time.)
Quality and Durability
Generally speaking, both the drone and the controller feel very lightweight and a little flimsy. The propeller guards are especially thin and feel as though they could be easily broken. You’ll also find they’re quickly knocked off if the drone hits an obstacle and the propellers are easily scratched as a result.
The drone comes with four spare propellers, but there are no replacement propeller guards included. This is something of an irritating omission since it’s the guards that frequently fall off and are most easily lost. (If you need replacement guards, you can buy them relatively inexpensively through Amazon. The propellers themselves always remained attached to the drone.)
Be aware that the cell phone holder can be easily detached by simply pulling it, without having to push the release first. This means the holder can potentially fall out while in use, and while the cell phone holder can be tilted upward to make viewing screen easier, it’s not able to stay upright when you attach a cell phone in its case.
The combined weight of the phone and case causes it to drop down again, and while removing the phone from its case allows the holder to stay upright, it’s easily knocked down again. This made the holder next to useless.
That said, there isn’t much reason to attach the phone in the first place, as while the app is the same that’s used to control other Holy Stone drones, it doesn’t seem to work with the HS340 (which you can buy here). You can, however, start and stop recording video and take still images with the app, but if you want to attach your phone to the controller and see where you’re flying, then you may be out of luck.
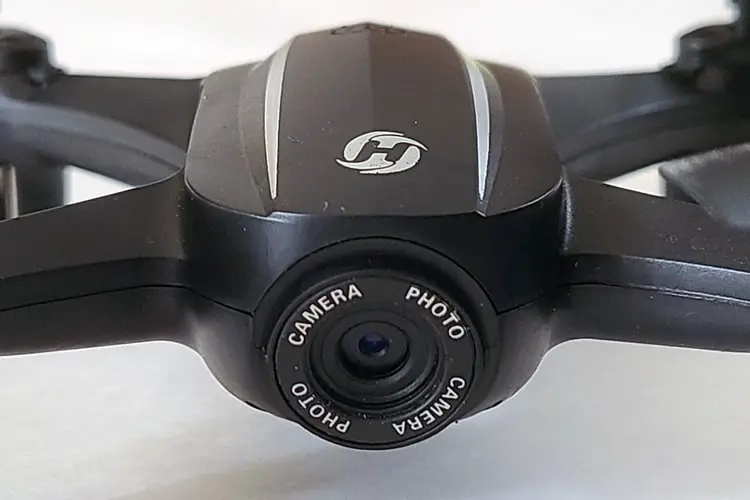
Lastly, the camera is fixed and cannot be moved or aimed in any way, it simply points straight ahead. While this might not sound like a big problem, you’ll find it a little restrictive as you won’t be able to easily film anything on the ground. If your target isn’t at the drone’s level, then you won’t be able to record it.
Performance and Ease of Use
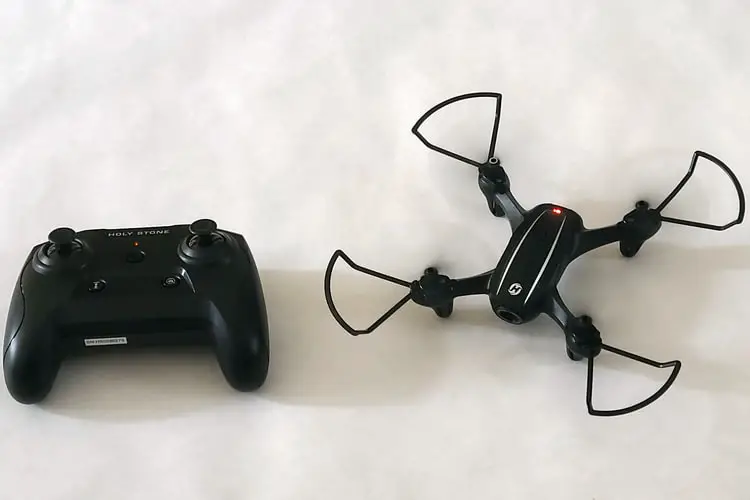
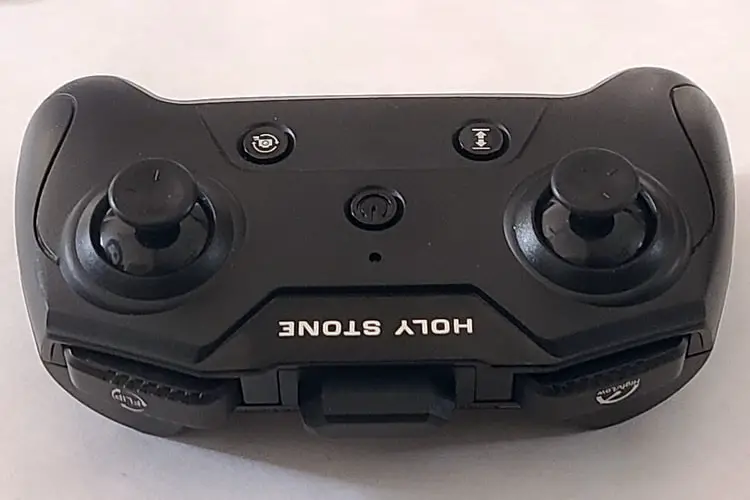
The controls are fairly standard, and if you’ve used a Holy Stone before then you’ll find the controller has the same layout as the controllers for other drones in their range. The left joystick controls the height of the drone and allows it to turn to the left and right, while the right joystick moves the drone forward, backward and to the side.
There’s a button below the left joystick to start the propellers and have the drone land gently, and a button below the right joystick to take a photo and start shooting video. The left button at the front of the controller adjusts the speed and the right button at the front causes the drone to perform flips.
Features & Functions
- Pairing: This needs to be done every time the drone is powered on and it’s often a good idea to re-pair the drone and controller after a crash. Moving the left joystick up and down will pair the drone and controller in just a couple of seconds. There was never any problem with pairing.
- Calibrating the Gyros: As with pairing, this also needs to be done every time the drone is powered on and is advisable after a crash. You can calibrate the gyros of the drone by pushing both joysticks to the lower left.
- Auto Takeoff: There’s no button that’ll cause the drone to launch automatically, however, it can be launched by gently tossing it into the air. This worked fine, and it’s certainly a neat trick. The propellers take a moment to kick in and then it hovers without any problems.
- One Key Landing: This worked well; the drone came down slowly and made a gentle landing.
- Altitude-Hold: Releasing the left joystick (that controls the altitude) enables the altitude hold function and causes the drone to hover at a consistent height above the ground. This worked reasonably well, but the drone has a tendency to drift.
- Trimmer: Since the drone drifts (even indoors, where there’s no breeze) you might find yourself using the trimmer quite a bit. You can trim its drift by holding down the button below the left joystick and then nudging the right joystick in the appropriate direction, but it was a little tricky to stop the drone from drifting completely.
- Speed Switch: There are three speeds, and while the slowest speed is fine for indoor use, you’ll probably need to use either the medium or high speed if you’re using the drone outside, as the drone could easily be blown away from you.
- Emergency Stop: The propellers immediately stop, causing the drone to drop to the ground. That being the case, it should be used with caution and only as a last resort. Not only do you risk damaging the drone and any property it hits (eg, cars), but it could also hurt someone.
- 360° Flip: The stunts are fairly basic. The drone can be flipped in four directions: forward, backward, to the left and to the right. It flips very quickly too; look away for a moment and you’ll miss it!
- Circle Fly: Pressing and holding the right button on the front of the controller will cause the drone to make a wide circle, perhaps about six feet in diameter, with the camera pointed inward.
- Auto-Rotation: Pressing and holding the left button on the front of the controller will cause the drone to rapidly spin. It works fine, but it’s hard to think of a good reason to make use of this.
- Headless Mode: This is a great feature for beginners. Activating Headless Mode before you start flying will allow the drone to always move forward, backward and to the left and right in relation to you, regardless of the direction in which the drone is flying. As long as you remain in one place, you can easily have the drone return to you by pushing the right joystick down toward you.
- Camera and Video: There’s no built-in SD card slot on the drone so you’ll need to record video and take photos on your cell phone via the app. Images were of good quality (1280×720 pixels) and the video was also clear (also 1280×720 pixels.) Unfortunately, as the drone is prone to being blown by the breeze, the video won’t be particularly smooth.
- Battery: Each battery lasted about 11 minutes, with the light on the drone flashing after 10 minutes to indicate the battery was low. The drone lands gently when the battery is too low to sustain flight. You’ll also find that some features – such as the flips – won’t work if the battery is low. Charge time for each battery is about an hour.
Target Audience
The HS340 (which is available here) is a great option for families or for anyone looking to get started with a basic, inexpensive drone. It’s simple enough that younger children can operate it under supervision, while beginners will find it an easy introduction to the hobby. The camera is a fun feature, but if you’re looking to capture some stunning aerial shots of your home or the scenery, then this isn’t the drone for you.
Specifications & Features
Specifications:
- Weight: 0.9 pounds
- Flight time per battery: 10 mins
- Number of batteries supplied: 2
- Battery charge time: 60 mins
- Total flight time, out of the box: 20 mins
- Maximum range: 131 feet (40 meters)
- Maximum height: 65 feet (20 meters)
Features:
- Headless mode: Yes
- Manual return: No
- Built-in FPV: No
- Smartphone FPV: Yes
- Auto Return: No
- One key take off / land: Yes
- Altitude hold: Yes
- Point of interest / custom mode: No
- Obstacle avoidance: No
- Stunts: Yes
- Colored LED Lights: No
What We Liked
- Easy to control
- Good battery life
- Good quality images and video
- Headless mode is great for kids and beginners
What We Didn’t Like
- Propeller guards came off easily
- Cell phone adapter didn’t work well
- Camera is immovable
Final Verdict
While the HS340 isn’t perfect, its faults shouldn’t prevent you from having fun, especially if you’re a beginner or have kids. It’s a very cost-effective and easy way to learn how to fly a drone, with even younger children being able to take control. While being on the smaller and lighter side, this also means the drone can be potentially flown inside, making it a great distraction on a rainy day.
If you’re looking for more information about drones, we’ve created a series of guides to the different drones available. You can check out our overviews of the best kids drone and the best drone under $200.
Additionally, we have a series of in-depth product reviews of specific drones, including our reviews of: the Holy Stone HS165 foldable drones, Eachine E520 Foldable Drones, Potensic d80 drones, Tomzon a31 flying pig mini drones, Snaptain s5c drones, Holy Stone hs340 mini drones, Holy Stone hs210 mini drones, Holy Stone HS110D Drones, Holy Stone hs120d drones, Holy Stone f181w drones, and our DEERC UFO mini drones. Each of these guides will walk you through the different features, instructions, pricing, and pros and cons for each drone to help you find the best one for you.
